

Digitize Old Photos
If you have albums or shoeboxes full of old photos lying around the house, it’s a good idea to digitize these and safely store them online.
It’s a quick process with older non-glossy photos:
- Place the photos on a table outside where there is good light with minimal glare.
- Take pictures of the photos (preferably using a digital camera).
- Upload digital images to Google Photos using your computer.
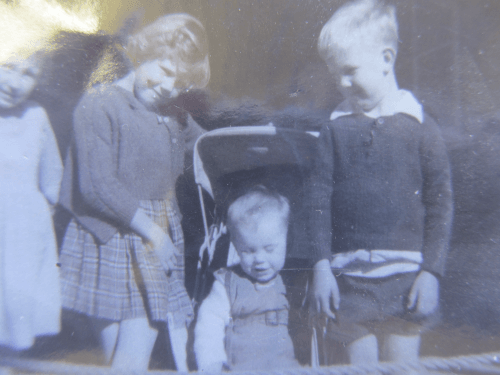
Most of my old family photos were digitized using the above technique using a digital camera.
This technique won’t work for the newer glossy photos due to glare issues.
Here’s what happens:
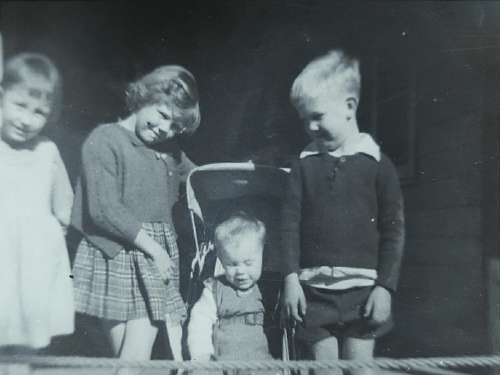
The solution is to use Google’s PhotoScan app on your phone. The PhotoScan app works the same as an image scanner but is easier and means you can do it using your smartphone.
Here’s the same photo taken with the PhotoScan app.
Here’s how to use the PhotoScan app:
- After launching the app, position your photo within the frame.
- Tap the shutter button. Four dots will appear and you hover your phone over each dot and hold in position until the dot is filled.
- Once completed, PhotoScan stitches together a single image from several overlapped photos eliminating any glare and evening out exposure.
Here’s a video to show how easy PhotoScan is to use.
After you’ve finished taking your high-resolution, glare-free images using PhotoScan, you just back them up to Google Photos along with your more recent photos.
Just search for PhotoScan in your App Store or learn more about the app here.

How to Add a Partner Account to Google Photos
If there are specific people you always share photos with (e.g. sharing photos of children with your partner), you can add them to your Google Photos account.
Simply tap your account profile photo or initial and then Photos settings > Partner Sharing > Get started.
You’ll then be prompted to enter your partner’s email address (they must have a Google account) and choose what you want to share. This could be items from a specific date or photos of a specific person.
You can change or turn off these settings at any time.
Learn more about sharing your Google Photos library with a partner in this help document.
👉 Note: If you want to hide the location on all shared images, tap your profile photo or initial in the top right and then Photo settings. Turn on Hide photo location data.

Safety and 2-Step Verification
Does the thought of uploading all your precious memories to Google Photos make you nervous? It’s understandable. Most people definitely do not want others seeing all their private photos and they might also be worried about losing photos that can’t be replaced.
Google Photos is a secure service (but of course nothing is foolproof). When you upload your photos and videos to Google Photos they are private by default; no one else can see them unless you specifically share with them. If you do share your photos or a particular album with someone via a link, there is of course the risk that the person with the link could pass it on. So only share your unique link with people you trust.
The other risk you face is if your phone is lost or stolen and you’re logged in to your Google Photos account. Your phone should have auto-lock and a passcode already as the first defense against this issue. Fortunately, Google will warn you about unauthorized attempts to access your account. You can log out of your account from another device if you think your phone has been stolen as well.
Your images and videos will not be available on the web for others to see through a Google Search or any other directory.
Three Ways to Make Your Google Photos Account Extra Secure
The following three tips will help add an extra layer of security to your precious memories on Google Photos.
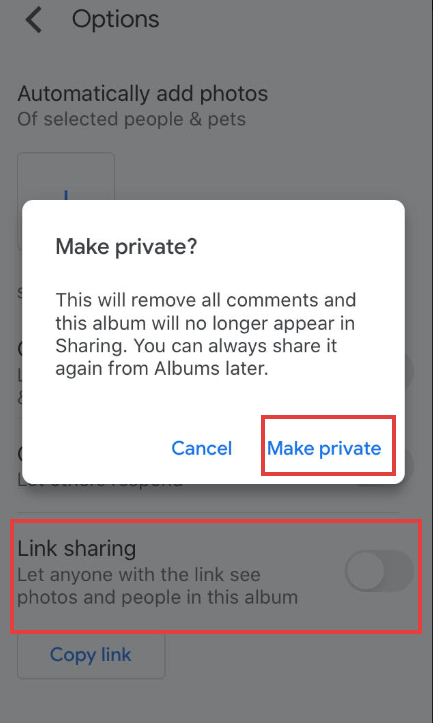
1) Review your album sharing settings
If you create an album of photos it will be private by default but if you can’t remember if you’ve shared it with others, you can check by going into the album on your app and selecting the three dots (…) in the top right hand corner. Select Options and you’ll be able to review your sharing settings. If you have shared an album via a link you can turn it off at any time by selecting Make private as shown below.
2) Hide your geolocation
If you want to hide the location on all shared images, tap your profile photo or initial in the top right and then Photo settings. Turn on Hide photo location data. It always pays to be mindful about sharing your geolocation. You don’t want to give away personal details like your home or work address to people you don’t know well.
You can also turn off location settings in the camera settings on your phone or device. Find out how to turn off location services on an iPhone here and review the process for an Android here.
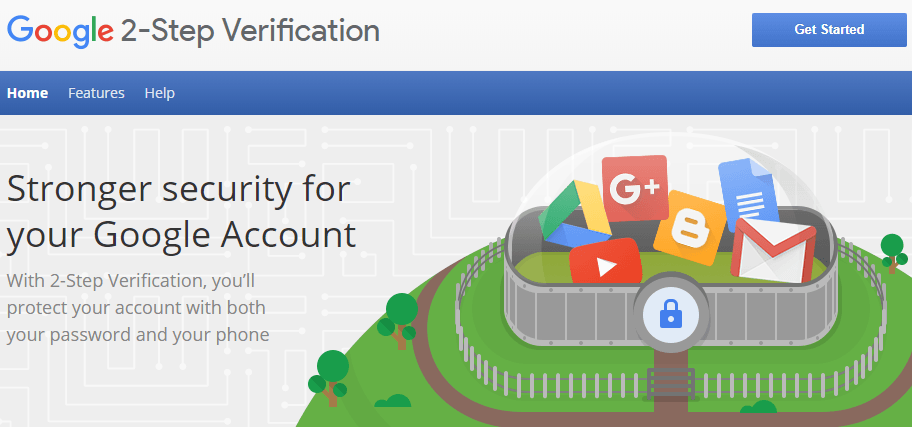
3) Enable 2-step verification
If you’re worried about your Google account being jeopardized by hackers, you might consider turning on 2-step verification. This means you’ll enter your password as normal and then be asked to enter a code that’s sent to your phone.
Just go to Google’s 2-Step Verification page to set up this extra security measure.
👉 Want to learn more about passwords? Check out our guide to passwords on The Edublogger.

Embedding Tips for Bloggers
If you have a blog or website, you probably know that a picture or video tells a thousand words. It can really break up your text and bring your content to life.
Embedding photos, videos, or albums from Google Photos is possible but Google Photos does not offer embed codes. So you have to use a work around.
The process is also a little more difficult than it used to be as you have to use Google Drive. As of July 2019 Google Photos and Google Drive are no longer integrated. Therefore, to transfer some photos from Google Photos to Google Drive, you have to download them from Google Photos to a computer and then upload them from the computer to Google Drive. From there, you can embed!
Read on to learn the process.
Embed Photos or Videos From Google Photos
Want to embed a video to your blog or website but don’t want to upload to YouTube, like my video of dolphins in the Swan River?
Would you like readers to be able to zoom in easily on a photo? Like my photo of my Ockerby ancestry below compiled by Rev Thomas Ockerby Hurst (my great-grandfather) in 1939.
You can do both by embedding videos or images from Google Photos into your website.
How To Embed Google Photos Into Your Blog Or Website
1. Upload the photos you want to embed to Google Drive. This is long-winded since Google Photos and Google Drive are no longer integrated (as of July 2019). Therefore, to transfer some photos from Google Photos to Google Drive, you have to download them from Google Photos to a computer and then upload them from the computer to Google Drive.
- If you don’t know how to download photos from Google Photos to your computer, these instructions explain the simple steps involved.
- If you don’t know how to upload photos from your computer to Google Drive, these instructions walk you through the process.
2. When the content you want to embed is in your Google Drive, click on the video or photo you want to embed and then click on the More (…) icon and select Share.
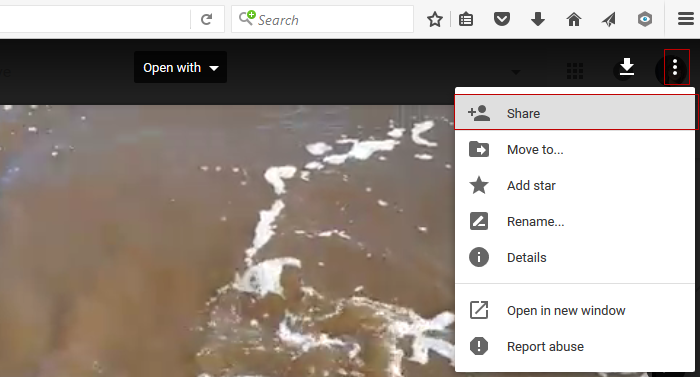
3. Click on Advanced option in the Share window.
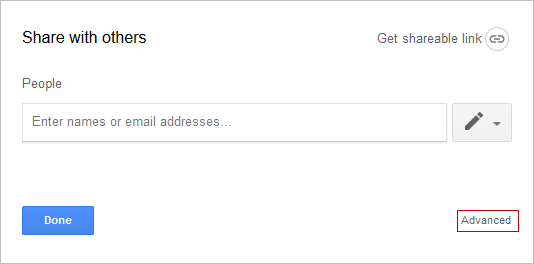
4. Click on Change next to Private.
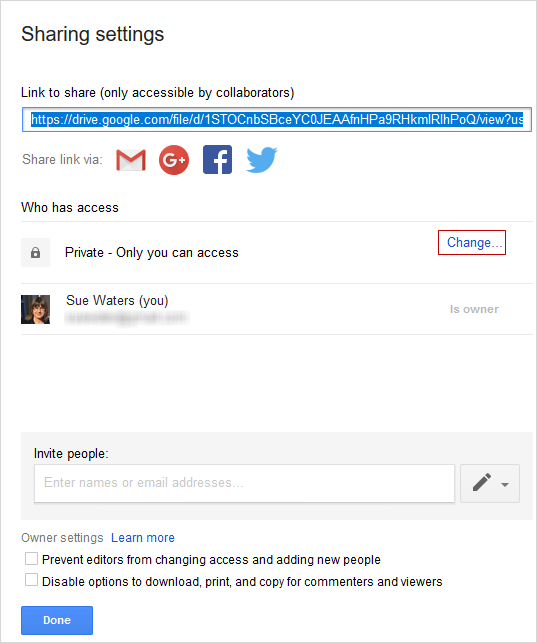
5. Click on On – Anyone with a link or On – Public on the web and then click on Save.
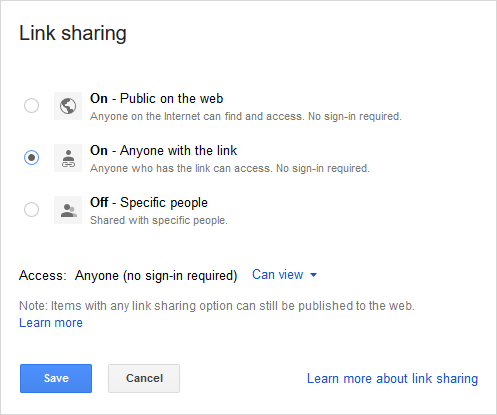
6. Click on Done to close the Share window.
7. Click on the More icon and then Open in new window link.
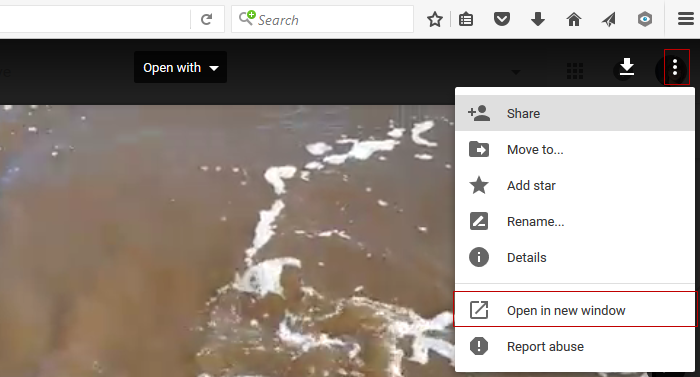
8. Click on the More (…) icon in the new window and select Embed item.
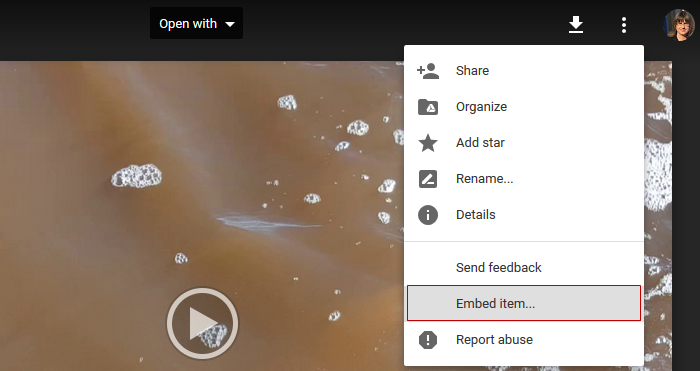
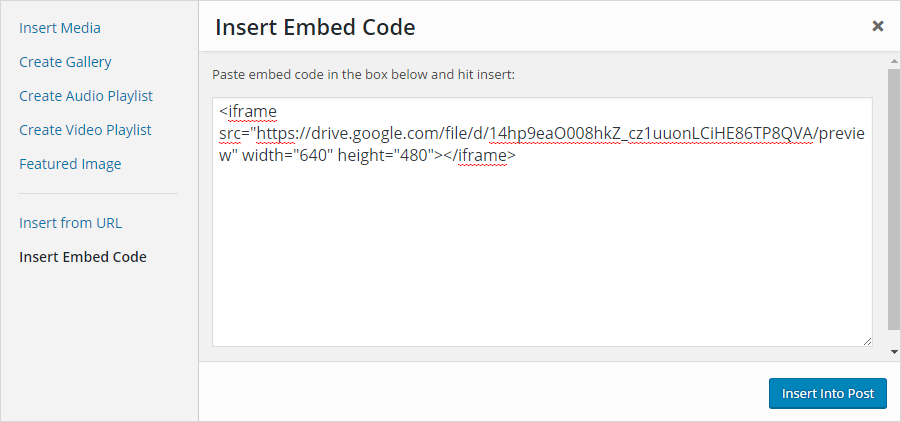
9. Copy the embed code.

10. Paste the embed code into your blog post or page using Insert Embed Code in the Add Media window and then click Insert Into Post.
The method you use will depend on the website or blog platform you use. This is how you do it on Edublogs and CampusPress networks.
11. Once your post is published you’ll see your photo or video embedded.
Embed Google Photo Album
Here’s how to embed a Google Photos album into your blog or website:
1. Log into Google Photos on your computer.
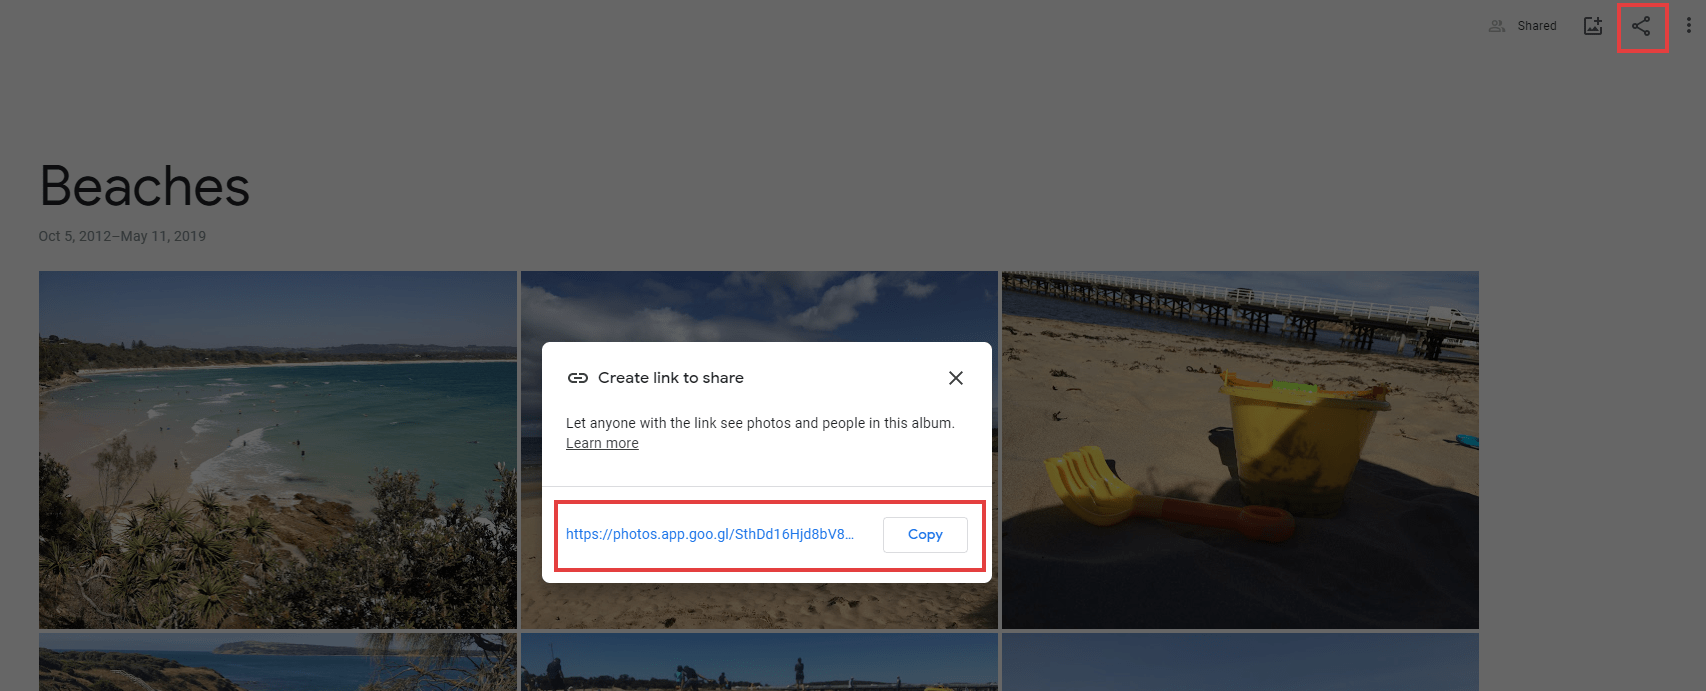
2. Click on the Album you want to embed. Click on the Share icon.

3. Click on Get Link and then Copy.
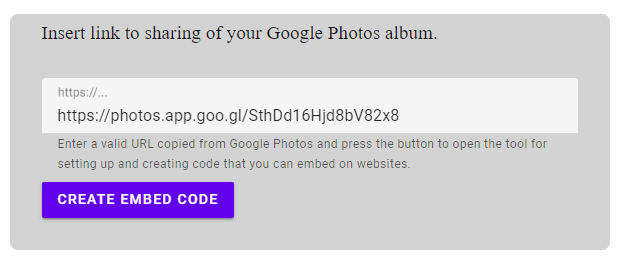
4. Go to Publicalbum.org scroll down until you reach the box as shown below.
5. Paste your Google Albums link into the box and press Create Embed Code.
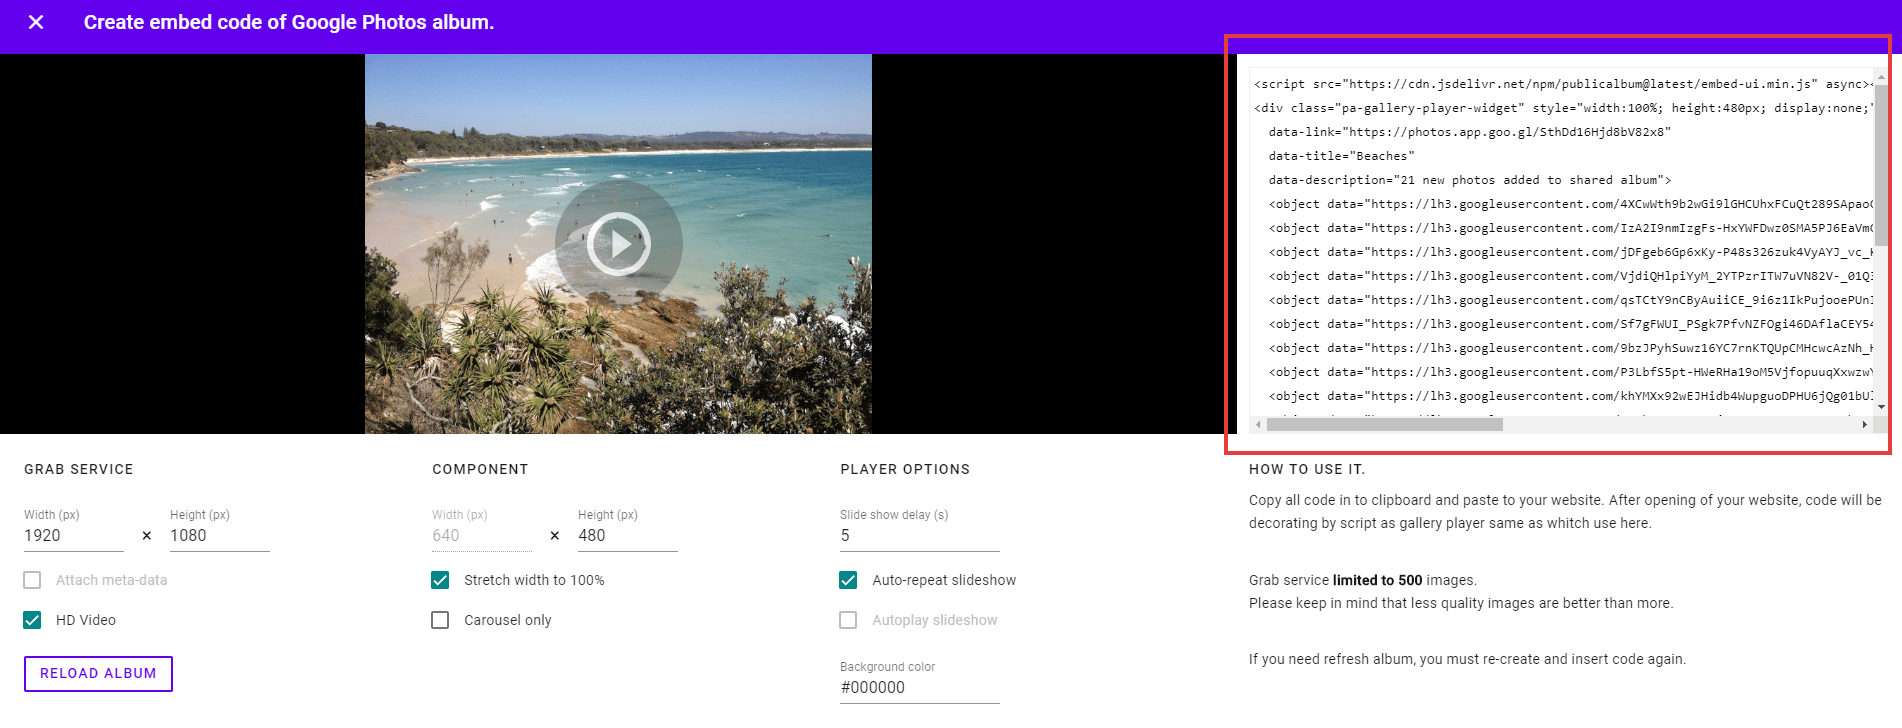
6. Here you’ll be able to change the way your album is displayed if you wish. When you’re happy, select the embed code on the right and copy it.
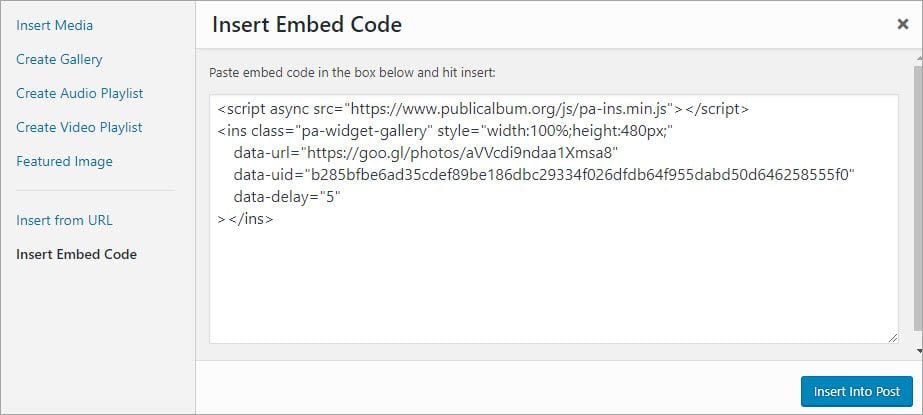
7. In your blog dashboard, click on Add Media > Insert Embed Code. Paste your code and then click Insert into Post.
👉 The method you use will depend on the website or blog platform you use. This is how you do it on Edublogs and CampusPress networks.
8. Once the post is published you will see the album embedded as a slideshow.
Here’s an example of an embedded Google Photos album so you can see what the embed looks like.
👉 Find out ideas for using Google Photos Albums in the classroom in this post.

Conclusion – Don’t Forget Physical Photos
We’re now well and truly living in an era of digital photography and there are many advantages:
- You can easily view and retake photos until you get the perfect shot. You’re not limited by a roll of film where you might only be able to take 24 photos!
- There’s no waiting around for images to be processed and printed.
- Images can be shared with family and friends in seconds, either privately or on a more public platform.
- There are countless ways to transform images with filters, collages, slideshows, or video.
- Most people have a phone in their pocket when they’re out and about so capturing the moment is so easy.
With all these advantages of digital photography, we shouldn’t totally forget about having hard copy prints of our precious memories.
Having a physical print, perhaps in a frame, or in a photo book can really bring the images to life. From a family history perspective, it can also be nice to have some carefully curated memories to pass on.
Google Photos helps with this too. If you’re in the USA or Canada there is a Google Photos Book printing service. If you’ve tried it, let us know!
For other countries, you’ll find that many popular photo printing and photo gift services (like Snapfish or Shutterfly) are now integrated with Google Photos. So, if you want to make a photo book, for example, you can search through your Google Photos while you’re making the book. This can be a real time saver when looking for images from certain times, locations, and so on.
Where to Find Google Photos Help
As much as we love sharing about Google Photos, we can’t provide individual help.
Please consult the official Google Photos help site https://support.google.com/photos.
Here you’ll be able to search for answers to questions or ask the community.
If you have any further tips to add we’d love to hear from you in the comments below!
About Us
Edublogs is the oldest and most trusted web publishing platform for students and teachers around the globe. We have helped create and publish more than five million blogs, websites and portfolios since 2005 while providing teacher-friendly, student-safe WordPress solutions at scale.
We offer both cost-efficient and free options, along with site development, hosting, security, plugin and theme support to ensure your digital presence is meeting your goals in a fast-changing digital world. Want to learn more? Contact us to receive more information.
Recommended Reading
You might also be interested in reading the following posts about photos and videos:
- How To Make A Slideshow Video With Photos And Music
- The Educator’s Guide To Using Video In Teaching And Learning
- Should You Use Student Photos Online?
This is section 3 of 3 in the series “A Beginner’s Guide To Google Photos”
- A Beginner’s Guide To Google Photos – Page 1
- A Beginner’s Guide To Google Photos – Page 2
- A Beginner’s Guide To Google Photos – Page 3
How to send more than one at a time photos.
John
These are some good advice if you want to read about school life and drama read Nikki’s Blog
If I save faces to my photos and I decide to transfer them to my external hat drive, do they save like tat too. Also can I drag one folder to another
My biggest question for Google Drive, and/or Amazon. When your phone syncs to either of these and you delete (say “pic1”) off your phone, is it still on the Drive ? And vice versa ?
I have a symbol I don’t see here on some of the photos in my Photo Gallery.
It’s a dotted circle with an upwards arrow inside it. It’s in the bottom right corner.
Can someone let me know what this means.
Thanks
I have personally never used Google Photos, but would definitely like to try after reading this post! Thank you for sharing!
I have personally never used Google Photos, but I definitely would like to try after reading this post! Thank you for the information!
What an informative article! MANY of the commenters have unanswered questions that reflect similar inquiries on my part. Could you please update or at the very least reply to your readers? I find that out of all these helpful, how-to, tutorial type blogs/articles I read, it’s so RARE for the writer to come back around every week to answer questions. It’s frustrating. We wind up here because inevitably we had a question that brought each of us here. PLEASE help, you would more than likely win with quite a few people and maybe just maybe make someone’s day!
In your post you refer to a helpful article. What article are you referring to? Is there a link available? Thanks
This is amazingly helpful and exactly what I’ve been looking for for ages, thank you so much. I never realised compressed quality photos were free. I’ve now selected this options which is great. However, I already had over half of my storage used where I’d been using the original quality option. How do I make it so that all my existing photos on there are compressed quality not original quality, it seems to have only done it going forward?
Thank you for providing extra benifits of Google photos. The movies , animation and collages features save me from paid playstore editing apps. The sharing feature also does its best providing all the sharing options through phone apps. The memory feature helped me to refrest those old beautiful moments. But unfortunately, google currently allows only 15gb free storage and one has to get a premium membership to use the cloud upto 100gb. Other than that, the editing tools like magic eraser is most favorite of mine.
Thanks for the info!
Google’s photos will not allow me to make any more albums. Is there a limit on how many you can have? I only have about 10 to 12 of them.
Second question is when I go into g photos it sometimes shows three or four of the same photo! It even shows photos that I deleted while on my camera. How do I delete them? I also want to delete all of my medical downloads that I screenshot that’s in there. Taking up space!
To bad google pics doesn’t have a setting to only auto save people or documents to the cloud unless done manually? Also duplicate photo button & then delete! Sounds so simple but no one
has it!
If you have photos in one album is there any way to drag them over to a different album? I can’t for the life of me find any video or tutorial that tells me how to do this
I’ve found that if I choose the photos I want to move by hard press then go to the 3 dots upper right corner it gives me the option to add to an album. Then you can delete them from the first if so desired.
I like this post, it is fun and informational.
Super interactive and fun looking, not hard to eyes and is simple for any person of any age.
I am digitizing my old prints and slides spanning 50 years. I saw your notes on Google Scan, but I have an Epson Scanner and Silverfast SE8 software and the images are on my Macbook and I created a “test area” with a subset of photos on a Google Photos desktop instance. I have about 10 shoe size boxes full of old prints I am scanning in 6 to 8 at a time… They are going to basic “finder” folders I am naming, much like albums…
I have not turned on the automatic backup or feed from my phone, iPad or Mac because I have a well organized “album” structure in iPhotos. I am hoping to leverage those “albums” and “upload” them into the Google Photos structure and I am trying to find out if that can be done in a “utility” manner. Also, if I have “seeded” Google Photos with photos that have “people” named, can these utility batches make the People connection for these old photos being loaded?
Any help with how to get these photos from two sources (computer folders and iPhoto app) uploaded and leverage as many Google Photos features I can would be greatly appreciated!
What a great tutorial! I only recently have had the time to really learn what to do with my photos and there are thousands of them on my laptop. Now I have the guidance I need and can start organizing sharing and printing my pictures. Thanks so much.
CONGRATULATIONS: Kudos to you for what may be one of the best instructional websites ever created! Your presentation and clarity is much appreciated.
SUGGESTION: Many of the comments being posted by others are also useful and some reveal a need for you to 1) update the site, or 2) point the commenter to the section which already has the requested information, or 3) re-phrase the comment so that it can be answered by you rather than saying you don’t provide assistance on specific queries. This all takes time, but does serve your readers well.
LABELS: It seems like many users of Google Photos don’t understand how Google is managing their photos. It seems like their system is the same that is used in Gmail with the use of labels or tags. Only one copy is stored in Google’s server, but labels are attached to each file as needed to indicate where is can be accessed. The label for the “main” or gallery area isn’t displayed since it is the default. If a photo is assigned to an album, then an “album” label is added, but the main label is not deleted. If a photo is deleted from an album, the tag is simply removed, but the photo itself is still there with it’s “main” label. Archiving a photo, however, adds the archive label, and removes the “main” label. Again, only one actual copy of the photo exists on the Google server. Please correct me if I’m wrong.
DRAWING: I would love to see a diagram or sketch that shows which tools/apps have to be used to manage my photos. Our household has two PC’s, three Android tablets, and two Android phones, divided into two Google accounts. Functions to cover in the diagram are uploading, downloading, viewing photos on each device, viewing all photos stored online, deleting from online, deleting from each device, which app does which of these tasks, etc.
PHOTO FOLDERS: Many of us have created directories with folders and subfolders as needed to manage our large collections. For example, I have scanned a folder of slides taken in the first year of a daughter’s life. I want to keep that set together online for security, to share with others, and to pass on to others when I’m gone. Google photos doesn’t maintain folders, but tries to re-create them as albums. Is there an alternate app or method to satisfy my needs, other than using a thumb drive or external drive? Covering this on your site would be useful to us, since Google Photos is missing this feature.
this was very strong and in detailed and really helps explain how to work the app and get around to everything. You gave alot of good tips and advice which i find very useful.
thanks for the tips i love taking phots and this might help a lot