
Do you have student blogs or are you thinking about setting up student blogs in the future? Maybe you have a class blog but would like students to publish their own posts?
My Class is a management tool that brings a class blog and all your student blogs/accounts together. It makes it easier for teachers to set up and monitor their classroom blogging program.
My Class is ideal for teachers with students who either have their own student blog or publish posts on the class blog.
My Class has recently had an update!
Along with improved functionality, student blogs can now be created without an email address.
If you’re already using My Class, go to Settings > Save to make sure all features are activated.
For our CampusPress users, there is now more control over students’ dashboards and the ability to create student blogs using a template. With blog templates, you can apply the same appearance, customized content in posts and pages, categories and more to all newly created student blogs.
This post explains all the features of My Class and how to use it.
- If you scroll down, you’ll find a video that walks you through setting up My Class.
- There are also 3 printables to use in your classroom that show how to write a post, how to leave a comment, and how to use the Reader.
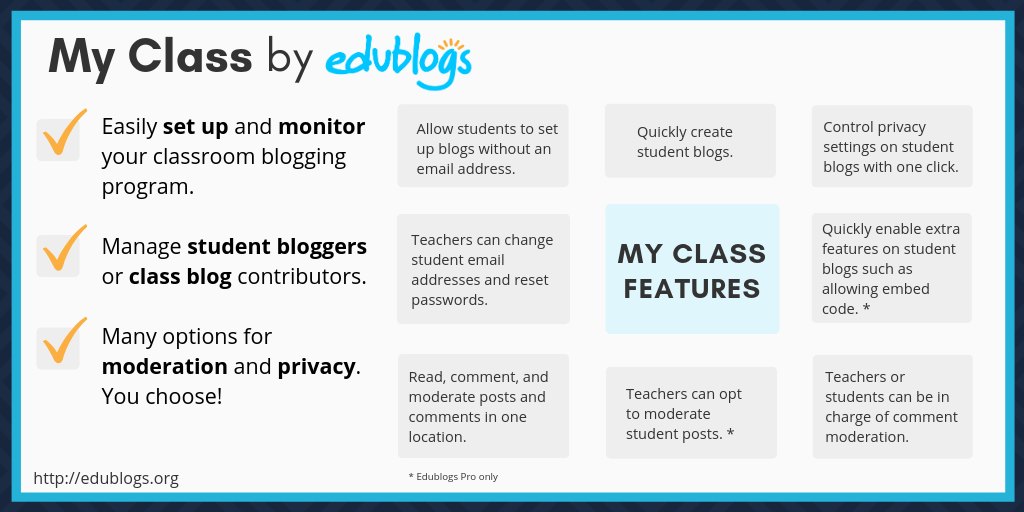
My Class Features
My Class is a management tool that teachers use to:
- Quickly create student blogs with or without a student email address.
- Allow students to publish their own posts on their student blogs and/or the class blog.
- Control comment moderation settings on student blogs. Either the teacher or student can be in charge of comment moderation.
- Control the privacy settings on all student blogs with just one click! Blogs can be public, private, or somewhere in between (e.g. search engines can be blocked or only logged in users can visit blogs).
- Quickly view and/or moderate posts* and comments in one location in the Reader.
- Quickly enable extra features on student blogs such as allowing embed code. *
- Configure the settings to ensure all student posts are reviewed by a teacher before the posts are published. *
*Note: My Class is available with free blogs; however, Edublogs Pro allows for teacher moderated posts and using embed code.
My Class Video
Want to be walked through the steps to getting started with My Class? I’ve put together a video that demonstrates how to set up My Class, how to add student blogs, and how to add the Class Blog widget.
My Class Cheat Sheets
Short on time or just want to read a summary of how My Class works?
Check out these cheat sheets which summarize the key features and show you how to get started.
 Loading...
Getting Started With My Class
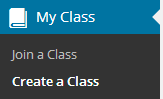
To get started you first need to Create a Class. Go to the dashboard of your class blog and follow the directions below.
(If you haven’t set up a class blog yet, you can get one for free at https://edublogs.org)
1. Go to My Class > Create a Class.
2. Select the options that work for you, such as:
(1) Select ‘This is a class blog’
(2) Select ‘No – use if you want them to publish posts on their student blog’
(3) Choose if you want to moderate posts and comments on student blogs
(4) Choose your preferred privacy option
(5) Decide which users (teachers) you want to manage your student blogs
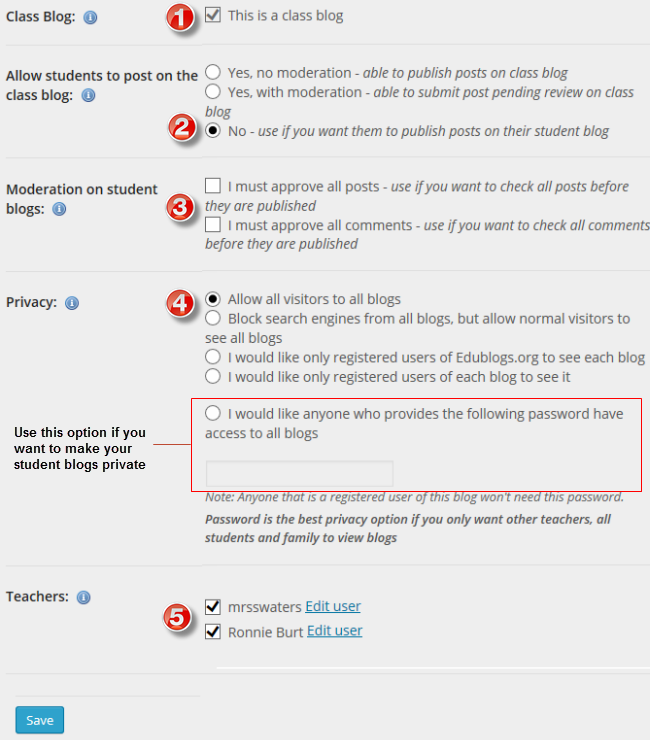
3. Click Save.
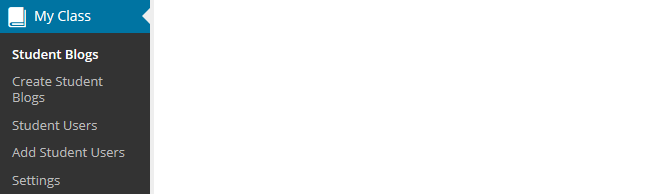
4. The My Class menu should change to the menu item shown below.
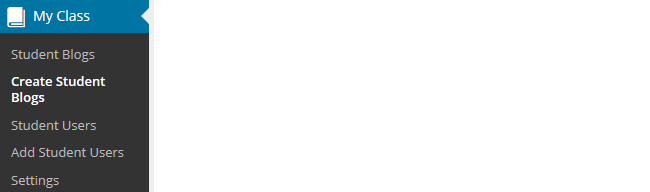
Once you’ve created your class there are two options for creating student blogs:
- You create the student blogs using My Class > Create Student blogs
- Students create their own blogs using the Edublogs sign up page
We’ll walk you through the first option.
Refer to the create own student blog support page if you want students to create their own blogs and attach their blog to My Class.
Create Student Blogs Using My Class
The following instructions explain how you create the student blogs yourself using My Class.
You create student blogs as follows:
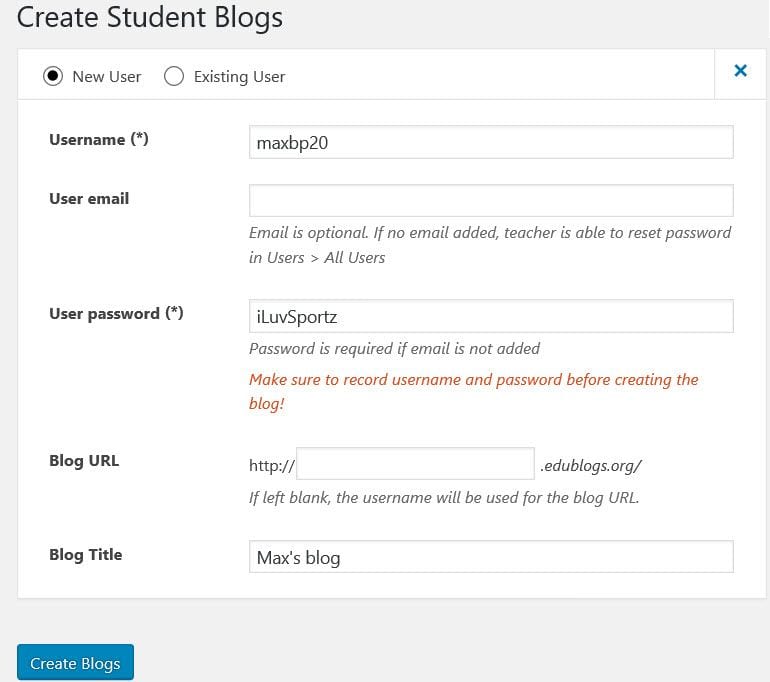
1. Go to My Class > Create Student blogs.
2. For each student, add a username, email address (optional), password, blog URL, and blog title.
- If you leave the email address blank their user account is created using our no email option and you will be able to reset their password using the Edit link under their username in Users > All Users.
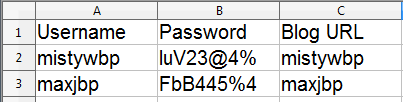
- All passwords are stored encrypted in our system and can’t be viewed by anyone, including the user. Record your students’ passwords in a spreadsheet as you create their account if you use our no email option.
- This creates their student blogs, adds them as a user to the class blog, adds you as a user to their student blog, and connects their student blog with the class blog.
We recommend you use the preset password option and record their username/password/blog URL in a spreadsheet as you create their blogs.
Some teachers require students to inform them when passwords are changed so they have a record of each student’s latest password.
This is handy for those students who forget passwords or provide the wrong email address.
3. Click Submit.
Once you have created all your student blogs they will be listed in My Class > Student blogs where you’ll be able to view all pending posts, pages, and comments.
Add Student Blogs Link
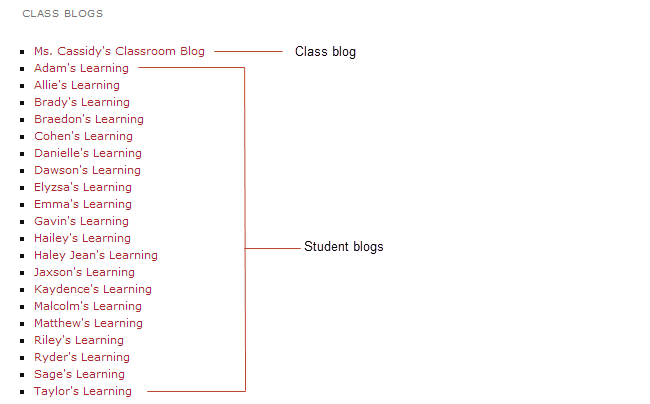
You and your students can easily add a link to all student blogs in the sidebar using the Class Blog widget.
To see what this looks like on live blogs, check out the sidebar of these blogs:
You add the class blog widget as follows:
1. Go to Appearance > Widgets.

2. Drag the class blog widget to the desired sidebar.
3. The widget will automatically open.
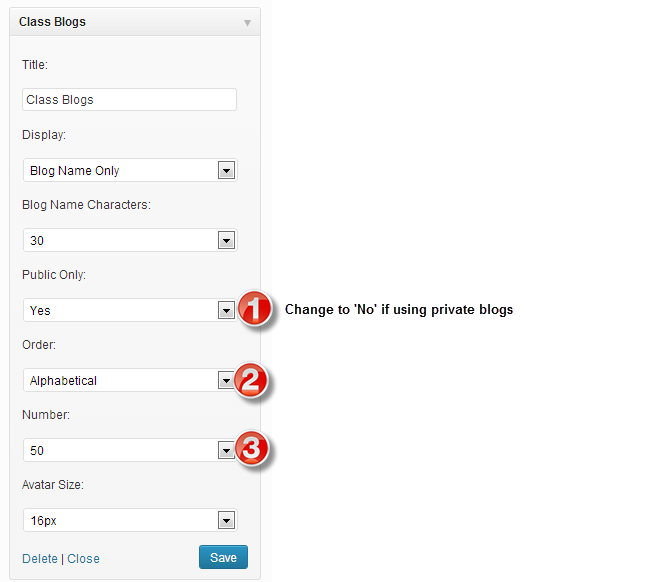
4. Choose the options that suit you and then click Save.
(1) Select ’No’ under Public only if you are using private blogs
(2) Select alphabetical under order
(3) Select the number of blogs to display
Please note:
- You can only use ‘Blog Name Only’ if you have more than 10 student blogs.
- Any time you add any more student blogs to My Class, you update the Class blog list by opening up the Class blog widget and clicking Save.
5. The widget will look something like below in the sidebar of your class blog and the sidebar of a student blog.
Navigate Between Dashboards
When you set up My Class, your student users are added as users to the class blog and to their own student blog.
The menu items the students see depends on which dashboard they are logged into and what settings you have set in My Class > Settings.
If your students see limited menu items it means they are logged into the class blog dashboard and need to navigate to their student blog dashboard.
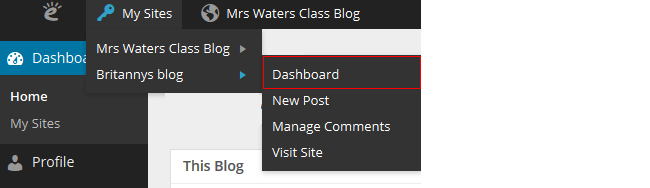
You change blog dashboards as follows:
1. Go to My Sites drop-down menu in your admin bar at the top of the blog.
2. Click on the dashboard of the blog you want to access.
Moderating Posts And Comments
My Class allows you to moderate comments on student blogs if you wish. Moderating student posts is a feature of Edublogs Pro.
Student posts and comments can be checked using any of the following:
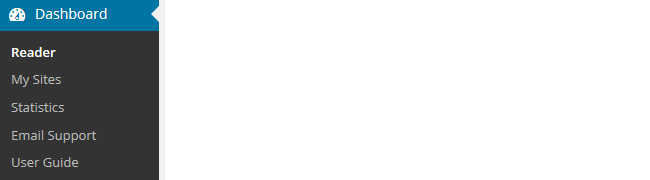
- Dashboard > Reader
- My Class > Student blogs
- Dashboard > My Sites
- Users > Reports
The Reader
The Reader is the fastest way to check all pending posts and comments on your student blogs.
This allows you to preview posts and comments and publish them with one click!
You would use the Reader if you used the following My Class settings:

The Reader is also where you and your students can read and comment on each others’ posts.
You preview posts and comments as follows
1. Go to Dashboard > Reader.
A number next to the Reader indicates there is a post or comment pending review.

2. Click on Pending tab

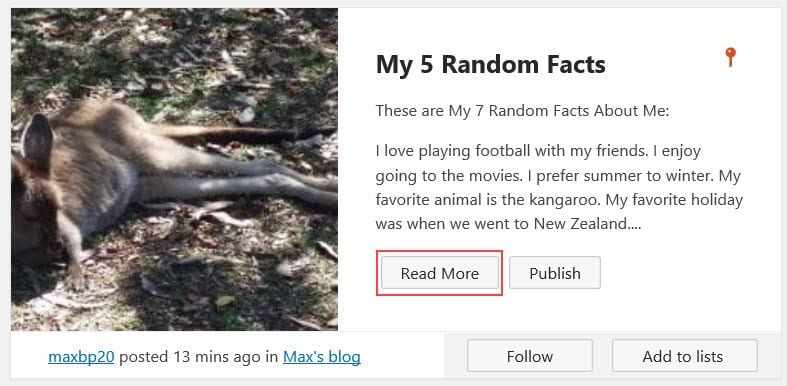
On the pending page, posts and comments are listed in reverse chronological order based on the date they were submitted.
3. Click on Read More if you want to read the full post or click on Publish if you are happy to publish the post.
- If you selected ‘I must approve all posts’ students aren’t able to edit the post once it is published.
- If you want the students to do further edits, you need to leave the post as pending or change the post to draft mode by opening it in edit mode.
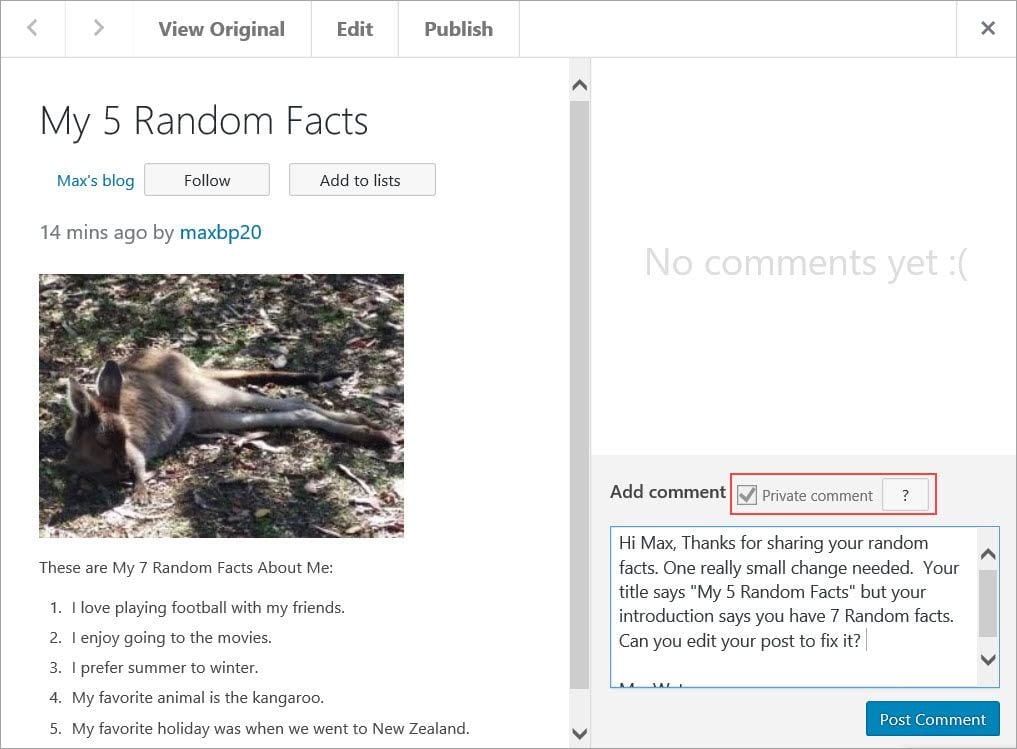
This displays the full post and allows you to select from the following options:
- View Original — when you click on ‘View original’ it loads the draft post on the student blog where you can see what the post will look like when published.
- Edit — clicking on Edit opens the post inside the dashboard of the student blog where you can make edits to the post.
- Publish — to publish the post, click on Publish. Please note if you selected ‘I must approve all posts’, students aren’t able to edit the post once it is published. If you want the students to do further edits you need to leave the post as pending or change the post to draft mode by opening it in edit mode.
- The forward and back arrows allow you to navigate to the next or previous student post or comment.
- You can send a private comment to the student by selecting Private comment, adding the message and then click Post Comment.
My Class > Student Blogs
My Class > Student blogs and Dashboard > My Sites is where you’ll see all your student blogs listed.
Here is where you can use the Dashboard link to access a student’s blog. You’ll also see the number of published and pending posts/pages/comments on their blogs.
Clicking on pending under a student blog takes you to the pending post or pending comments page inside their student blog dashboard where you can edit, approve, or publish the post or comment.

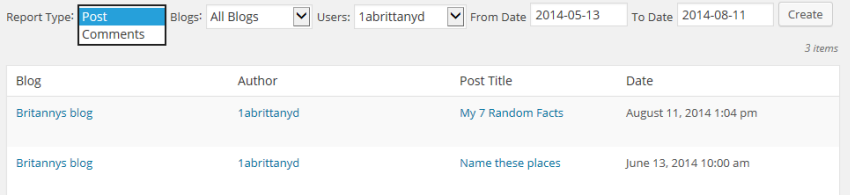
Reports
Reports, via Users > Reports, allows you to run a report on a specific student.
It allows you to check comments they’ve submitted on any blog, or posts they have published for a specified date range.
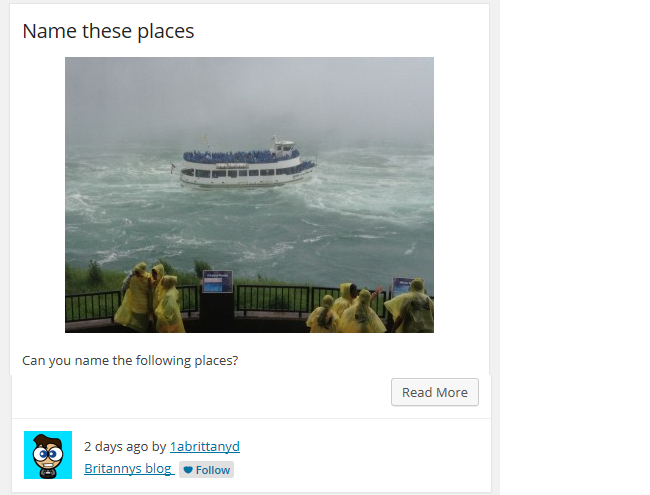
Reading Student Posts
The Reader automatically feeds all published posts from all student blogs and the class blog into the dashboard of every user attached to My Class. This is where you and your students can easily read and comment on each others’ posts.
You read posts as follows:
1. Go to Dashboard > Reader.
2. Click on Read More if you want to read the full post.
This displays the full post and allows you to select from the following options:
- View Original — when you click on ‘View original’ it loads the draft post on the student blog where you can see what the post will look like when published.
- Edit — clicking on Edit opens the post inside the dashboard of the student blog where you can make edits to the post (only visible to the teacher).
- Add New Comment — allows you to add a comment to the post from inside your dashboard.
- The forward and back arrows allow you to navigate to the next or previous student post or comment.
Guides For Your Students
Once your blogs are set up, the three main things you might need to guide your students on are:
- How To Write A Comment
- How To Write A Post
- How to Use The Reader
These guides should help! You can publish them on your class blog, display them in your classroom, or print them for students.
If you have a CampusPress network and would like customized guides for your network, get in touch with us.

Loading...

Conclusion
I know when I first started with student blogs it was a big time commitment because checking students’ posts meant opening up individual tabs to visit each individual blog.
My Class has made student blogging so much easier! Managing or just keep an eye on your student bloggers can happen in one location — right in the dashboard of your own class blog.
If you have further questions about using My Class, be sure to check out all our help guides or get in touch with our support team who are available 24/7.
Do you have any experience using student blogs or My Class? Or maybe you have further questions about My Class? Leave a comment below!
Recommended Reading
You might also be interested in reading the following posts about student blogging:
This lesson was really helpful in walking me step by step through the process. I now fell ready to jump in and set up the students blogs. I have 150 students this year so I am thinking of creating a page for the students blogs. I will take the suggestion of adding a sidebar widget also so students can connect with other students. I think it will take me a little bit of time to get them all set up.
So glad this information helped. Good luck getting all your student blogs set up. Hopefully the teacher they have next year is happy to keep the blogs going too! 🙂
Great pictures that explain well what is going on!
Question: While viewing the video, I happened to see something about a limit of 35 blogs listed in the sidebar as class blogs. Is there really a limit. I have 96 students. Before researching Edublogs on how to set up student blogs, I created a page entitled Student Blogs. I had planned on just having a link for every student’s blog on that page. Is it possible to put the Class Blog widget on just that page, or would it just be better for me to put a list of links on that page?
Hi there,
There isn’t a limit on the number of student blogs you can have, however, when you have over 10 blogs you’ll have go into your widget settings and change it to show blog title only. Showing the avatar and the title for each student won’t work for a big group.
Some people do like having a page with all the students’ blogs instead of the widget or as well as the widget. Here is an example from ceramics teacher, Heather Alexander. http://missaclay.edublogs.org/student-blogs/
The benefit of the widget is that all the students can drag it over to their sidebar so that everyone who is part of the class is connected to everyone else. If you want it on a page as well, you can just copy and paste the info from the widget. Some teachers like having the page as the class blog widget is pushed to the button on mobile devices (as are all sidebar items).
Hope this helps? Feel free to email [email protected] with your blog URL if you need more help.
My big question – I have posted an assignment for students and would like them to then post their answer/ assignment to my class blog. Is this possible without them having their own student blogs AND not just making comments in the comment section? I want them to post, not comment but I don’t want to have to set up a blog for each student.
Question #2 – If I was to have students create their own blogs, is it easier for me to have them create their own and then join my class OR better if I create a blog for them?
Hi Renae,
To answer your big question, the answer is yes. You can add students as a class blog user. This means they won’t have their own individual blog but they will be able to add posts to your class blog. This help guide will walk you through the process https://help.edublogs.org/add-student-users/
As for creating your own student blogs, or having them join the class it might depend on the age of your students and how many blogs you want to set up. Teachers with younger students often prefer to set up the blogs themselves. If your students are older, they might use the join code. Another option is the invite code. This is where you give the students a URL so they can join the class (and set up a blog if you want them to). This option is popular with older students and you can read more about it here https://help.edublogs.org/invite-users-with-join-codes/
If you want to go through your situation more or want more help to get started, feel free to email the support team — [email protected]
Thanks!
This tool looks so good! Seems to be really useful. I have tried using edublogs with a class in a prac and really struggled to get them all logged in and started. My class might be something I need to give a go in future.
Great! I hope you find it useful!
The MyClass feature is my number one reason for using Edublogs! Of course, I didn’t discover all that it could do until we only had a few months left in the school year. This year I’ll be training my kids on the Reader right away.
Yay! That’s exciting, Carly. We’d love to hear how you get on training your kids to use the reader!
I love My Class in Edublogs and feel that it is often overlooked in light of other platforms, such as SeeSaw.
Is the addition of email-less accounts in line with GDPR? I remember discovering the hack to be able to create accounts using ‘+text’ on the end of a Google account. The only issue is that this can sometimes contriven the local policy in place.
For example, Global2 requires students to sign up with their school email.
Originally published on Read Write Collect
Hey Aaron,
Glad to hear you’re a My Class fan. It does make life a lot easier! I’m not sure how I managed when I had a class full of student bloggers. Opening up 27 tabs to see what they’re up to just sounds impossible! Hopefully more people will start enjoying the My Class features with the new school year kicking off in the Northern Hemisphere.