
We know all teachers work hard to ensure every student and member of their community is catered for, but creating accessible web content might not be something you’ve ever considered.
In order for your class blog to be valuable, it must be accessible to all students. This includes individuals with visual impairments or disabilities that require them to use a screen reader or other assistive technologies.
Fortunately, there are a few strategies you can implement to make creating accessible content for your class blog straightforward. By formatting and structuring your posts with these tips in mind, you’ll make them more available and useful to all your students.
In this article, we’ll discuss why accessibility is crucial in content creation. We’ll also share seven strategies that educators can implement to ensure their class blog is valuable for all readers, regardless of ability.
Let’s get into it!
The Importance Of Creating Accessible Web Content
Web accessibility refers to sites that everyone – including users with visual, hearing, motor, and cognitive impairments or disabilities – can access and use.
Creating content that’s available to all establishes inclusiveness and makes it easier for any user to navigate the web.
By creating your class blog with accessibility in mind, you increase the number of students and other visitors who can read, understand, and interact with it. Not only does this provide more meaningful user experiences, but it can also result in better design. And for those hoping to generate more traffic to their site, it can help with Search Engine Optimization (SEO).
Plus, accessibility isn’t just an added benefit – it’s a requirement. For example, in the US, Title II of the 1990 Americans with Disabilities Act (ADA) prohibits schools from discriminating against students with disabilities by preventing access to their programs, activities, and services. Sections 504 and 508 of the 1973 Rehabilitation Act have similar laws.
Put simply, failing to make your web content accessible can result in legal ramifications. In fact, studies have found that the number of ADA accessibility-related lawsuits in the US were up almost 200 percent last year.
The World Wide Web Consortium (W3C) outlines Web Content Accessibility Guidelines (WCAG) that serve as a foundation for most laws established by countries and states. Under this guidance, web content – including your class blog – must be perceivable, operable, understandable, and robust.
It’s crucial to help your students understand the importance of accessibility. Learning to create high-quality content is a valuable skill, and ensuring that content is accessible is essential.
How To Create Accessible Content For Your Class Blog (7 Key Techniques)
As you can see, accessibility for class blogs or any website is a must. If you’re not sure where to start, we’re here to help!
Here are seven key techniques you can use to make sure your content meets the necessary standards.
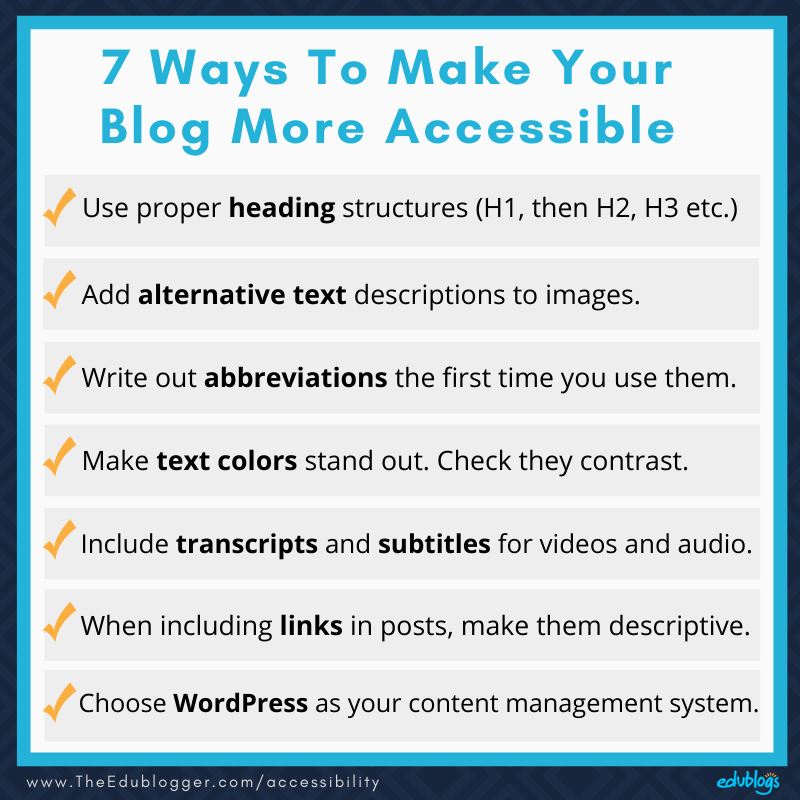
1. Use Proper Heading Structures
Navigation is a major factor in web accessibility. One of the most important aspects of this component of your site is how your pages and posts are structured.
Some bloggers make the mistake of breaking up different sections by bolding text or changing fonts. However, screen readers and search engines don’t take such stylistic aspects into account. In order for these tools to register a new topic, you’ll need to use headings with proper HTML tags.
There are six levels of heading tags you can use, from <h1> (the largest) to <h6> (the smallest). It’s best to use these tags in a way that reflects the organization of your page. For example, the screenshot below shows how we have used <h1>, <h2>, and <h3> headings in a blog post.
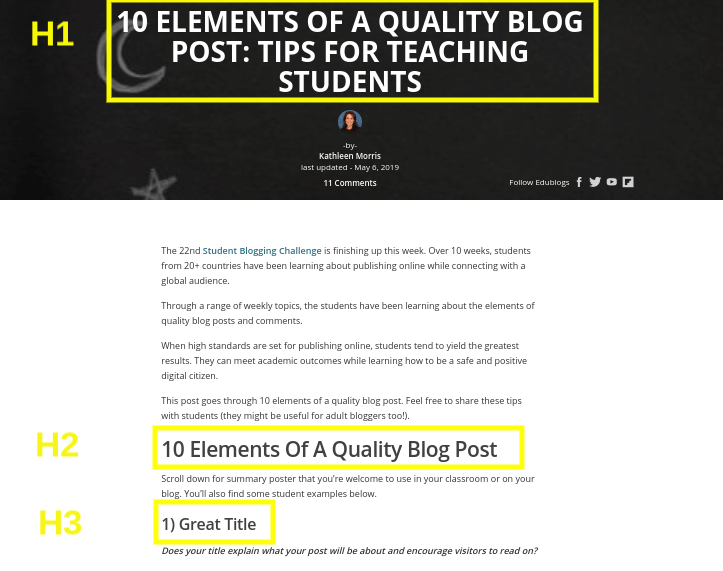
Each page should only have one <h1> tag, which is the main title. Then, the various sections of the page should be wrapped in <h2> tags, with sub-sections in <h3> tags, and so on.
Adding heading tags to your posts is quite simple. If you’re using WordPress, just select the Heading block, then choose the appropriate size.
This is what it looks like to select Headings using the Block Editor.

Or, in the Classic Editor, select the best option from the dropdown menu as shown in the image below.

Alternatively, you can add the tags manually by editing in HTML.
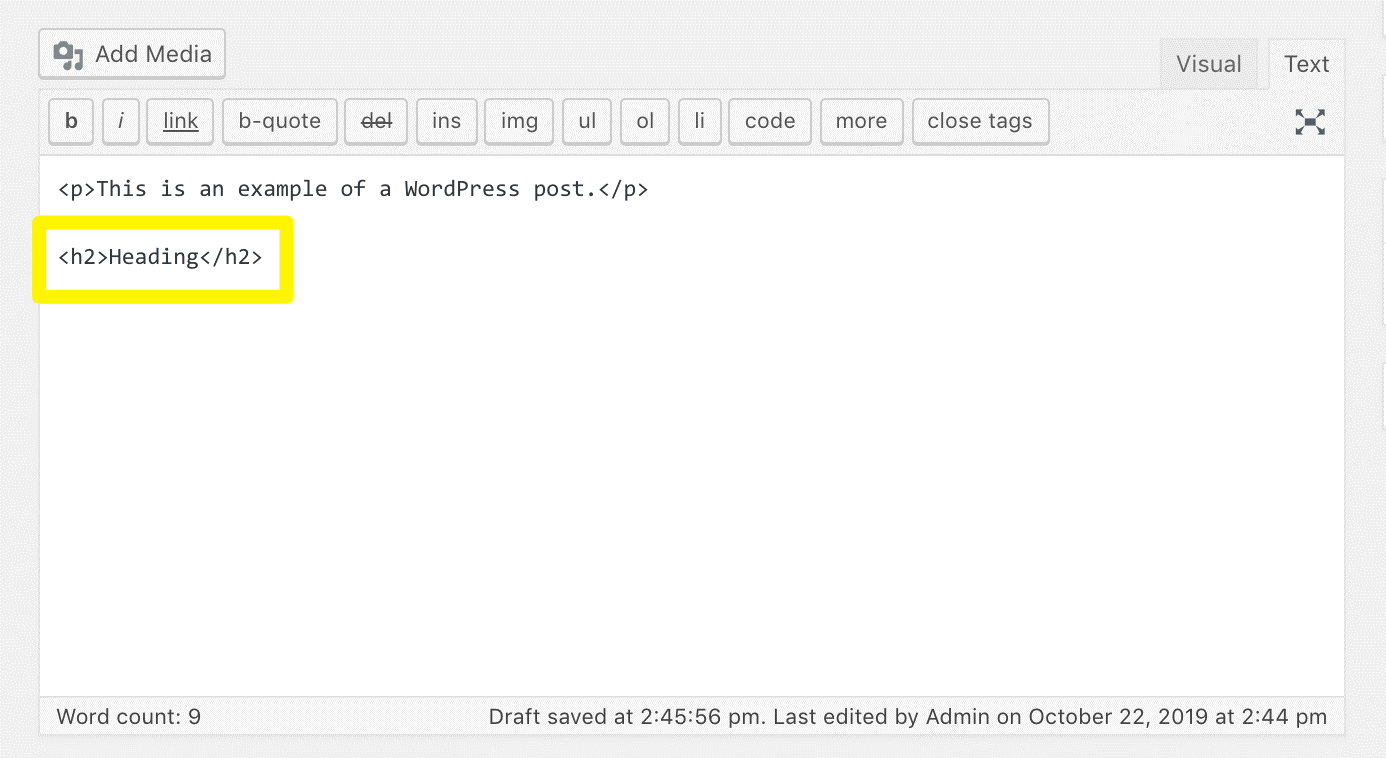
This latter method also works if you’re using a different platform to create your class blog or website.
2. Add Alternative Text To Images
Alternative or ‘alt’ text is used in web content to describe non-textual elements, such as images and graphics.
By adding alt text to your posts, you can help screen reader users interpret and understand what’s on the page even if they can’t visually perceive it. This text is also displayed if the file doesn’t load on the page.
It’s best practice to add alt text to images as you upload them. This reduces the likelihood that you’ll forget to go back and add it later.
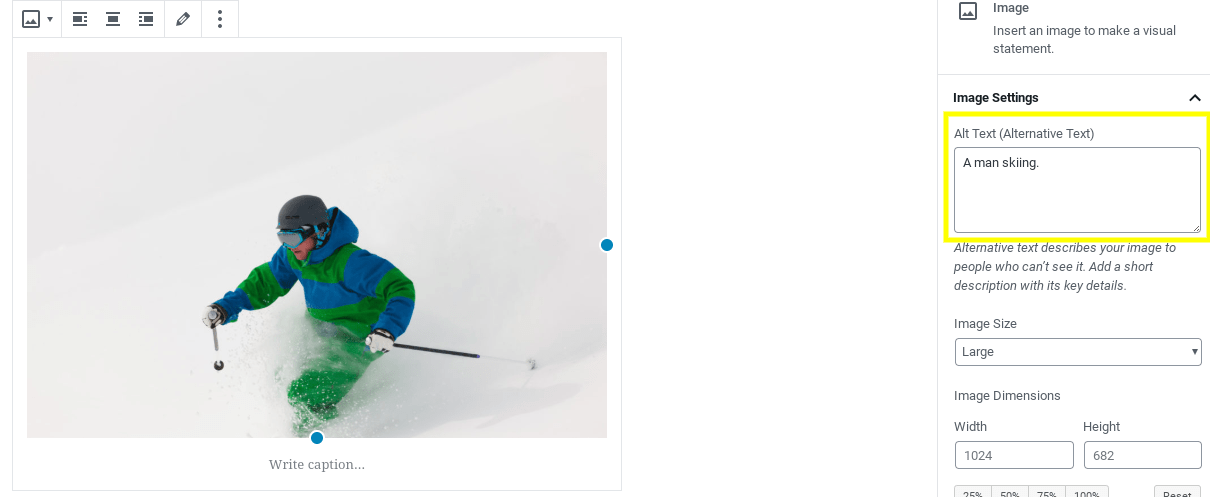
If you’re using WordPress for your class blog, you can find the Alt Text field in the right sidebar of the Block Editor after you upload an image.
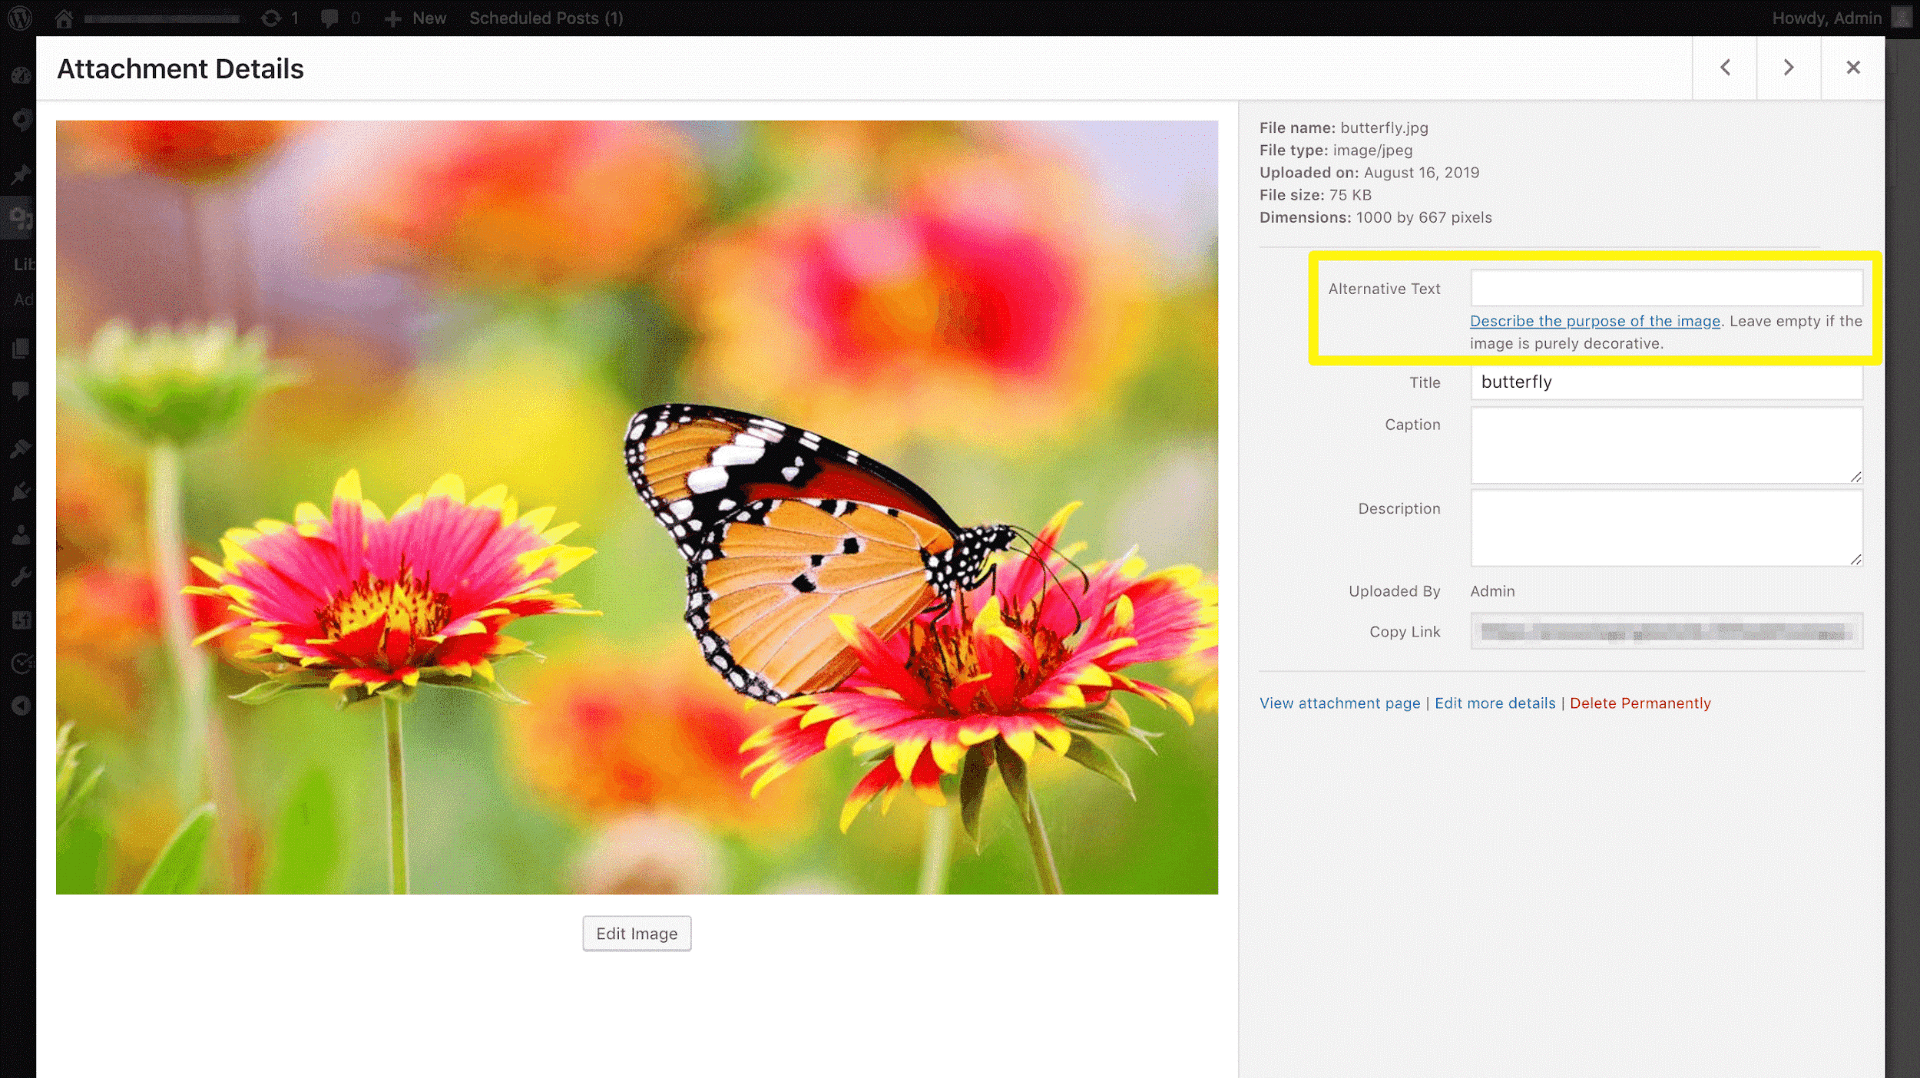
You can also add alt text via the Media Library.
When creating alt text, the goal is to keep it simple. It should inform users who can’t see the image or graphic what is on the screen without being overly long and detracting from the main content. Keep in mind the alt text is not a caption, but rather a concise description. If you’re not sure how to craft properly descriptive alt texts, the Web Accessibility Initiative has an excellent tool to help you.
3. Write Out Abbreviations
Acronyms and abbreviations are often used in educational content. However, to make your class blog accessible, it’s best to spell them out so site visitors – especially those using screen readers – don’t get confused.
Abbreviations can be tricky for a number of reasons. Some have multiple meanings. For example, ADA stands for both the Americans with Disabilities Act and the American Dental Association.
Additionally, some acronyms spell out other words, which can make hearing them confusing. For instance, OWL stands for ‘Online Writing Lab’, but may sound like a reference to a nocturnal bird when said aloud by a screen reader.
On the other hand, continuously spelling out the full meaning of each acronym can become redundant. A best practice is to include the expanded version at first mention, followed by the abbreviation in capital letters wrapped in parentheses.
Each subsequent mention can use the shortened version alone. It’s also recommended to include a link to a resource that either defines or further explains the acronym.
4. Make Text Colors Stand Out
Strategically using color on your blog can help enhance its design. However, when done well, it can also improve your site’s accessibility.
For people with visual impairments such as color blindness or low visual acuity, sites with high color contrast are easier to see.
Typically, using a dark font color on a light background is a safe bet. The goal is to prevent the text from blending in with the rest of the background. It’s wise to avoid using the opposite combination (light text on a dark background).
Combinations with limited contrast, such as blue text on a green background, can also be difficult to read. If you’re not sure about your color scheme, there are a handful of ways you can test the visual elements on your blog, such as the Colour Contrast Analyzer.
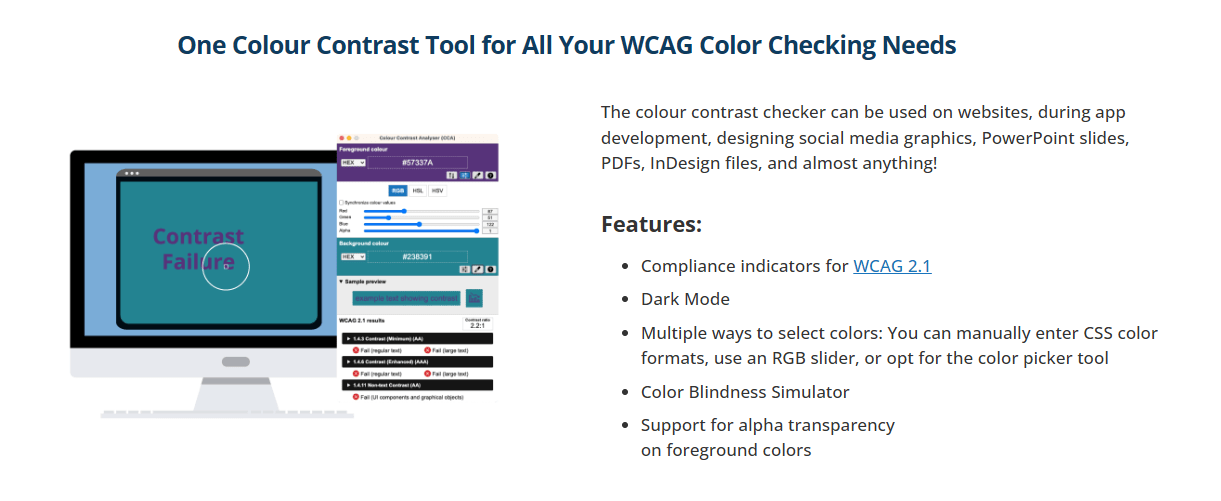
You can use this tool to examine the text and visual elements of your page. It also tells you whether the legibility is in compliance with WCAG standards.
5. Include Transcripts And Subtitles For Video And Audio Content
Video and audio files are a powerful way to enrich your class blog. However, they need to be formatted and configured so people with hearing impairments are able to access and understand them.
An effective way to go about that is to include subtitles and transcripts for any content that relies on sound. This will provide a text version of the video or audio that you can display alongside it.
Some bloggers simply add the text on the same page under the media player. Another option is to create a separate link for the transcript to open in a new tab.
Transcripts are also helpful for SEO. Search engine crawlers can use these text files to understand the content of the video. Plus, captions and subtitles have even been shown to help improve literacy.
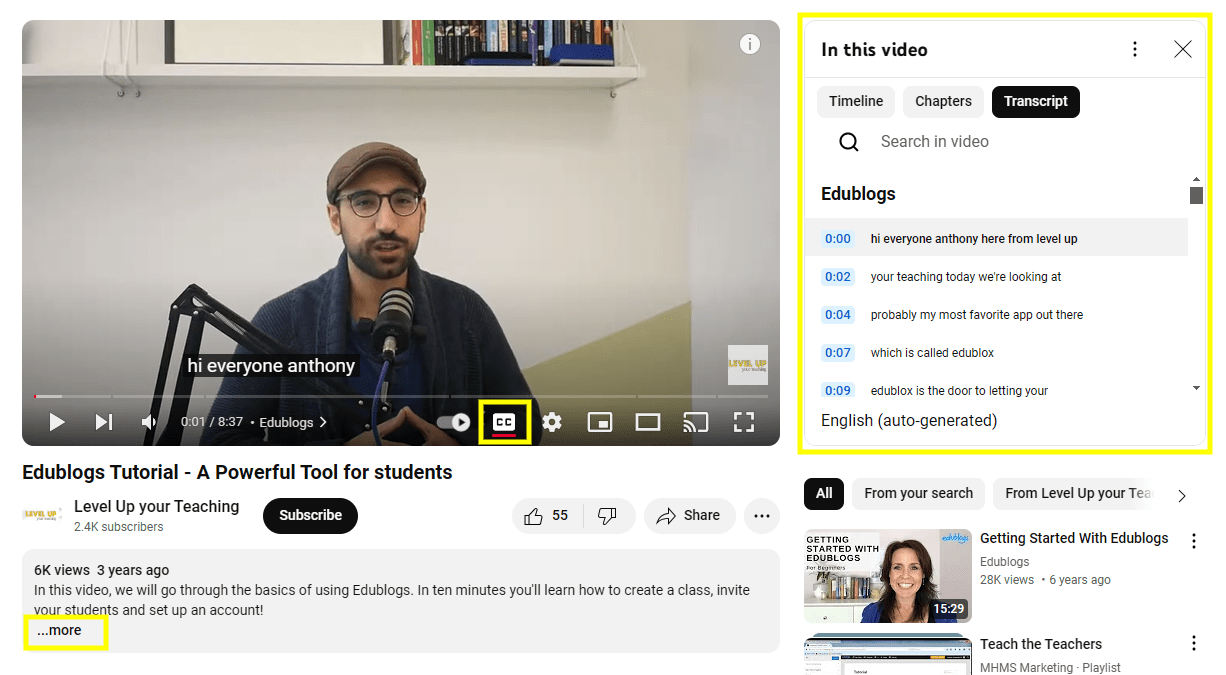
Some platforms – such as YouTube – automatically produce transcripts and captions with videos. You can click on the CC button to turn on subtitles or click the …more link in the video description, then scroll down and click Show transcript.
If you do use the auto-generated transcripts and captions from YouTube, it’s a smart idea to double-check them to ensure they’re accurate. Should you need to, you can edit them by going to your Video Manager and clicking on Edit > Subtitles and CC for the relevant video.
6. Create Descriptive Links
Just as you can add alt text to images to improve blog accessibility for screen reader users, using descriptive links can help inform readers about the destination of a link.
For example, rather than using ambiguous words and phrases like Click here or More, it’s better to use a relevant, descriptive phrase that hints at where the link will take users who click on it.
This doesn’t require a lengthy explanation of the linked resource. You only need to give the user an idea of where you’re directing them in the appropriate context. For instance, using the anchor text “this article on climate change” tells your students that the link is to a scientific text.
Although you can audit the links on your blog manually, this can be time-consuming. You may consider using a web accessibility checker tool such as WAVE.
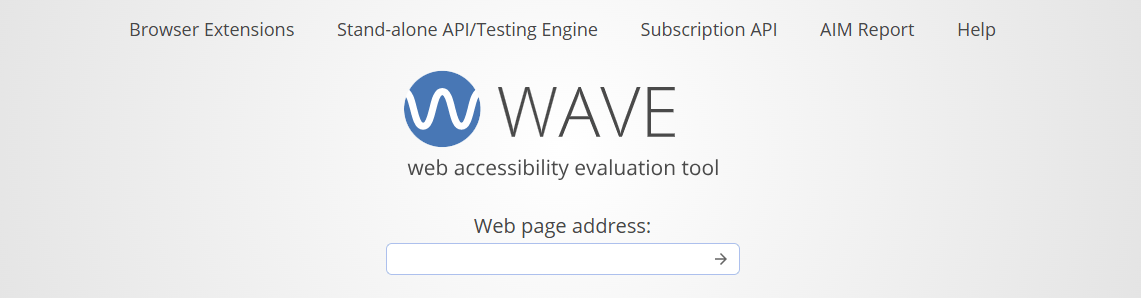
After inputting the page you want to analyze, this tool scans your site and checks for any errors. It flags items such as redundant links, and you can filter the details by WCAG 2.0 requirements.
7. Choose WordPress As Your Content Management System (CMS)
The platform and tools you use for your class blog can have a major effect on accessibility.
WordPress, for example, is a CMS that takes accessibility very seriously and has built-in features that can improve your blog content in this regard.
We’ve already mentioned some of these features in this post. For instance, WordPress makes it easy to add alt text to images and to incorporate heading tags, even if you’re not well-versed in HTML.
Similarly, using a learning platform such as CampusPress can make creating an accessible class blog simple. CampusPress hosted sites come with accessibility-ready themes that are compliant with WCAG 2.0.
You can use CampusPress to host and manage your entire WordPress class blog. Our platform can also help you create ePortfolios and individual student projects that meet accessibility standards.
Conclusion
All teachers strive to make their course materials accessible to all. Some educators don’t realize that this also includes your class blog or other content you publish online.
An accessible blog is structured and formatted in a way that’s easy to both understand and navigate, regardless of your readers’ abilities.
This post shared several techniques you can use to create accessible content for your class blog. Proper heading structures, alt text for images, and video transcripts all make it easier for students (and other readers) with disabilities to interpret content.
Plus, platforms built with accessibility in mind make WCAG 2.0 compliance simple.
Want more? Check out our complete guide to accessibility and WordPress here.
Questions?
Do you have any questions or comments about creating accessible content for your class blog? Let us know in the comments section below!
cool thanks
Very important to learn about this!