
This is a guest post from Roslyn Green who is a secondary school (high school) teacher from Melbourne, Australia.
Roslyn uses Edublogs and CampusPress to blog with a number of her classes a variety of ways which she explained in a popular post on The Edublogger in 2018.
Since her last post, Roslyn has been investigating different ways to embed eLearning options on her blogs. She has tried out a number of free websites that allow the development of interactive activities for students (online worksheets, games, and so on).
In this post, Rosyln goes through six different free tools that you might find useful to make your class blog or website more interactive. They are:
Back To Basics!
If you’re new to blogging, you might need help with the basics before diving into these tools.
- Don’t have a class blog or website yet? This free self-paced course will walk you through the process of getting started!
- Don’t know how to embed content on your blog? It’s simple once you get the hang of it. This tutorial will show you what to do. Note: Embedding can’t be allowed on free blogs due to misuse by spammers.
- Don’t know how to add links to your text on your blog posts or pages? Check out this tutorial.
Now on to Roslyn’s post…
A Message From Roslyn
Dear Colleagues, Teachers, and Fellow Bloggers,

The six activity options that I have introduced below are relatively easy for teachers to develop, yet engaging and absorbing for students to use. Furthermore, they can all be embedded or linked in your blog posts in order to vary classroom work, consolidate student learning and facilitate differentiation where necessary.
Some of these activities are almost guaranteed to transform even the most dreaded afternoon class into a walk in the park.
I hope you will find the websites as useful, varied and intuitive as I have.
All the best from Roslyn Green
My own blogs: History | Psychology | German
1) Flippity https://www.flippity.net
The Flippity site is a treasure trove. It allows you to serve up interactive activities with limited time outlay on your part.
With its support, you can make flashcards, provide matching games, generate bingo cards, print crosswords and try many other options. All you will need to get started is a Gmail account and access to Google Docs.
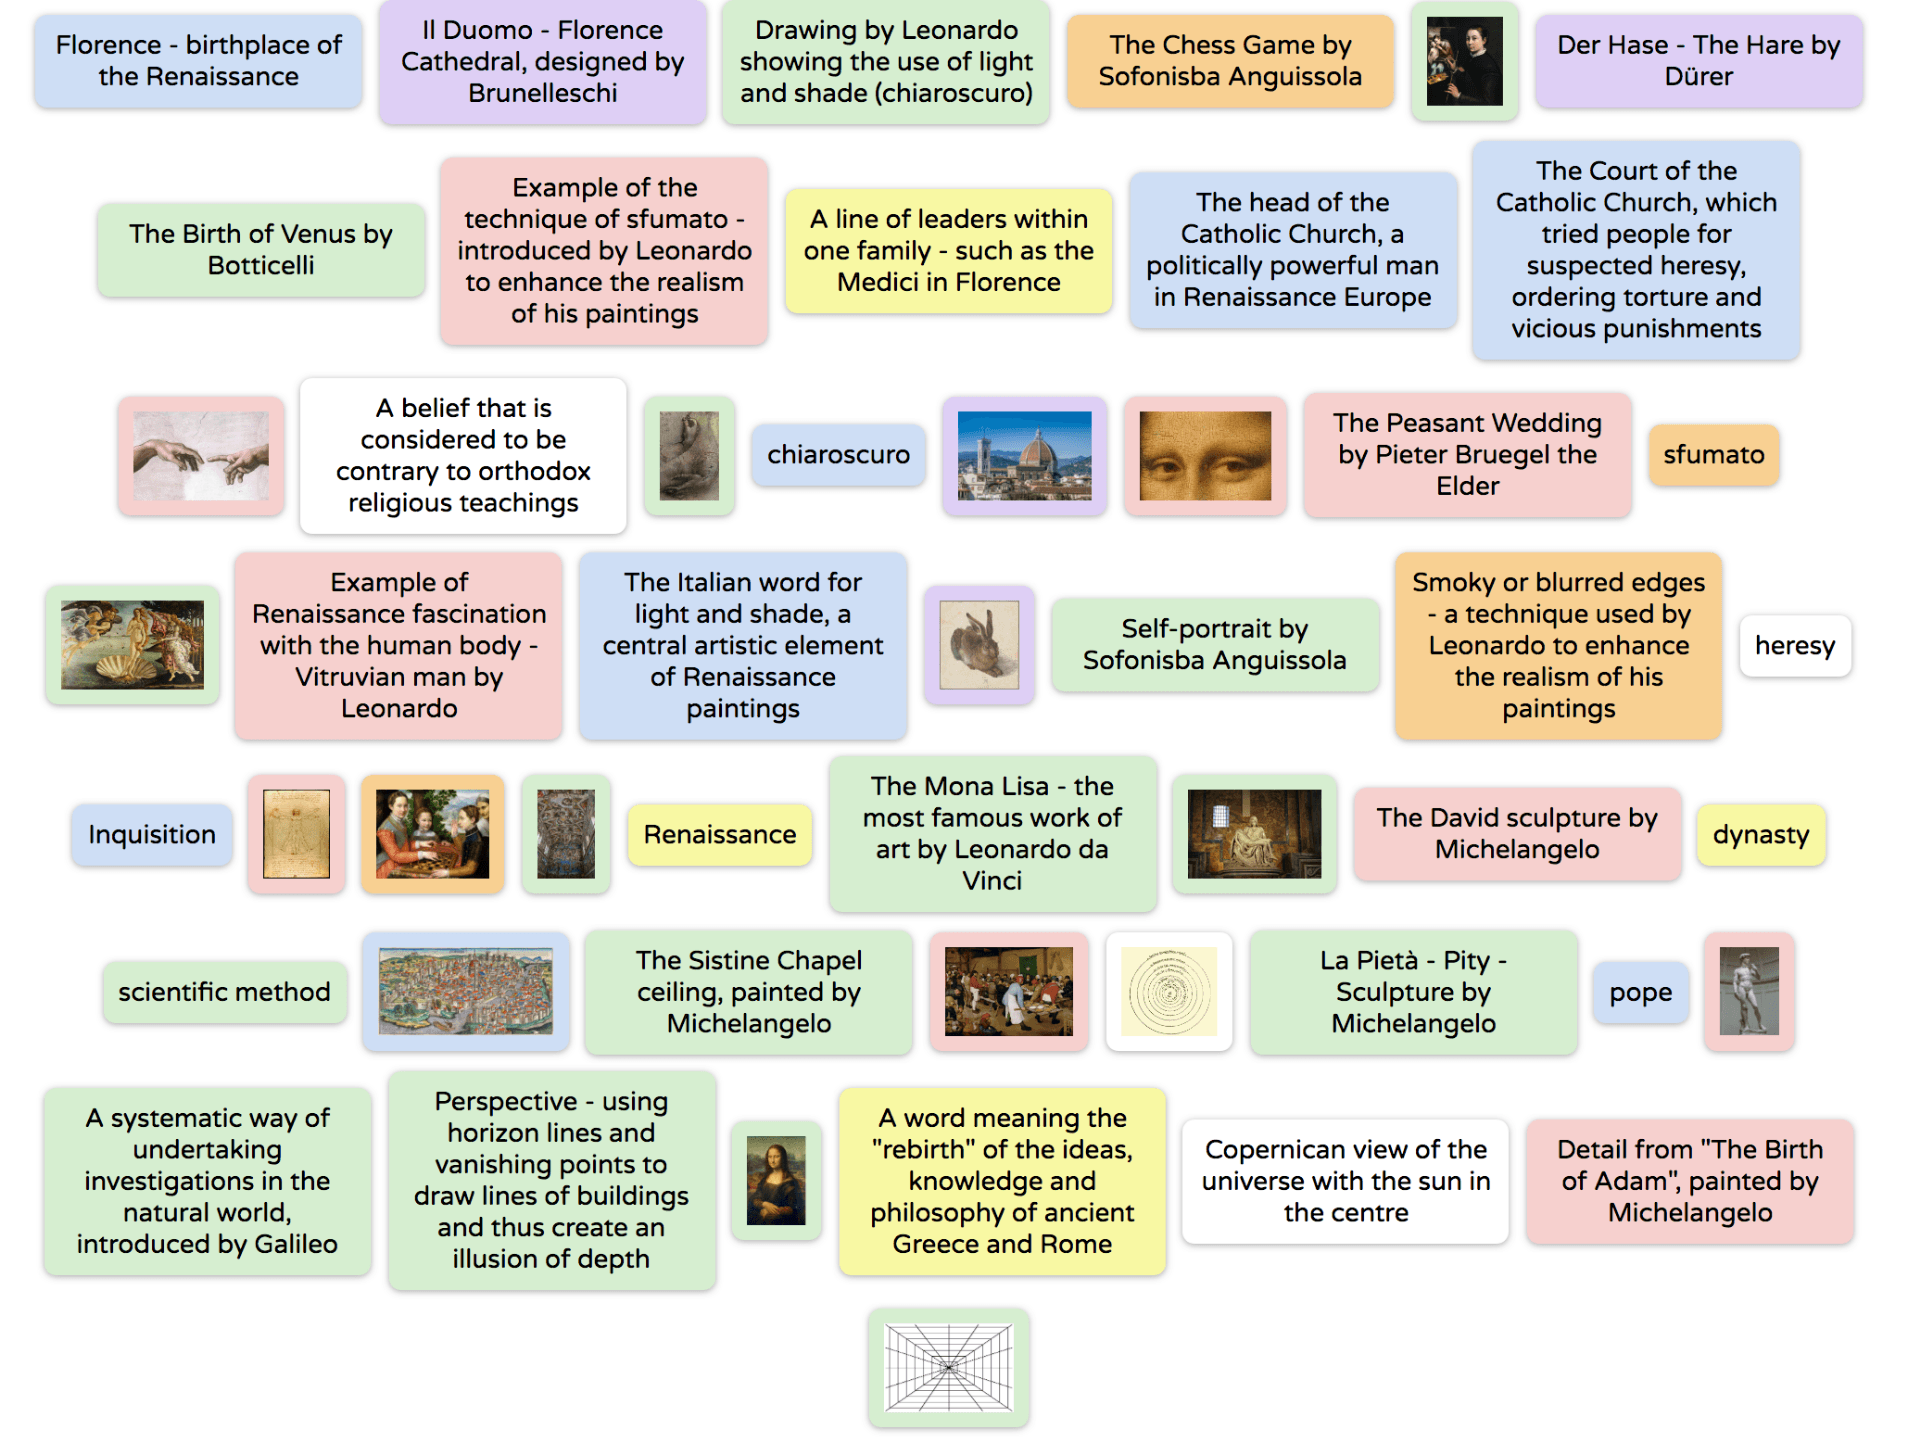
Essentially, you can make a set of flashcards on any topic and then, from this single data set, generate several other activities. Here is a clickable example:
An Introduction to the Renaissance
Once you have created your flashcard set by following the instructions at https://www.flippity.net, you can generate a number of exercises and games to consolidate learning of vocabulary and understanding of concepts.
For example, you can get your students to play a matching game on their devices. It looks like the screenshot below and is dangerously addictive.
There is a host of other options, but my favourite one is the bingo card generator which allows you to print a set of randomised cards OR give your students a link that brings up a bingo screen on their own devices.
Here is a bingo link for the set above, along with a screen capture to show how this looks on students’ screens.
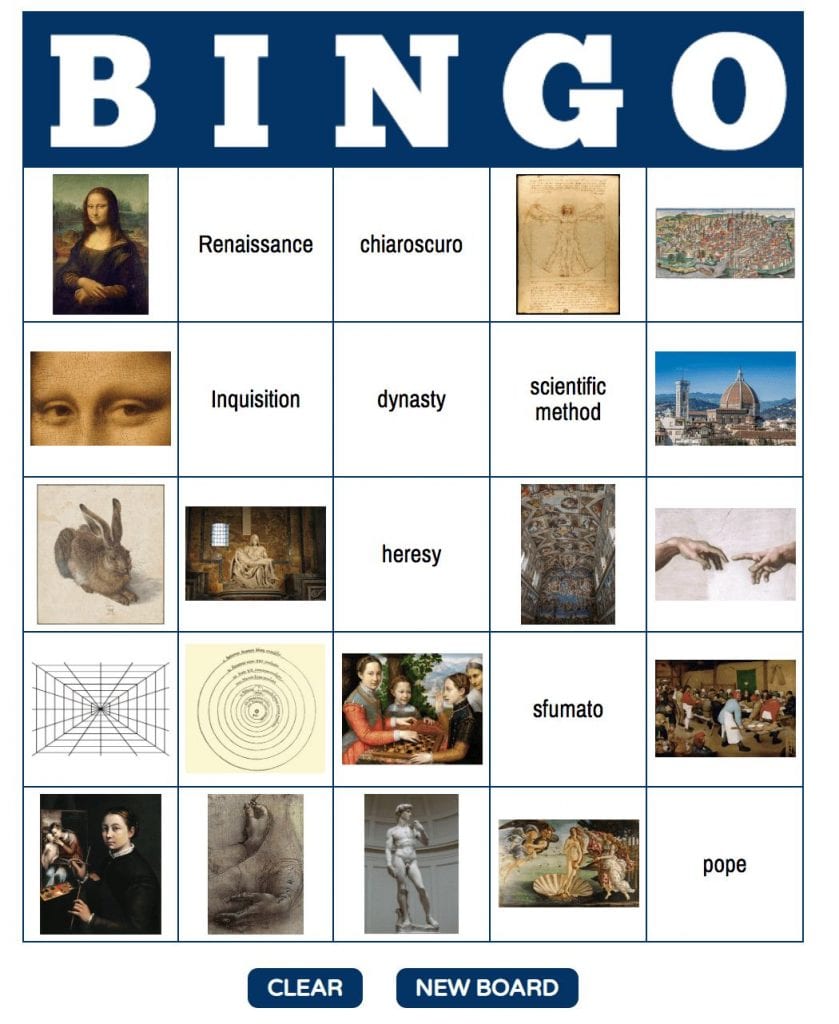
Students always ask to play bingo games “one more time”.
The advantage of this option is that the teacher can go beyond the factual information in the cards and begin to focus on concepts. For example, “Mark a picture that demonstrates the Renaissance fascination with the human body” could lead to several choices, as could “Find an example of the Renaissance interest in realistic depictions of nature”.
In this way, students can choose whichever option brings them closer to BINGO! — and scarcely notice that they are learning.
2) H5P https://h5p.org
This site was my best find in 2018. It is free, interactive, modern-looking and intuitive.
In a single presentation or quiz, you can introduce multiple choice questions, fill-the-blank texts, drag the answer to the blank and various other question types.
An online presentation can include embedded questions of various kinds.
Below is an embedded example of a presentation quiz. Click on it to try it out.
History: The Anglo-Saxons and the Early English Language
As you can see, this embedded quiz looks like part of your page or post.
A particularly addictive type of question is drag and drop. This allows you to create matching games in which students are required to classify or match up answers, pictures, words or statements.
Once you’ve mastered the process of creating these questions, which is a little tricky at first, you can create:
- Diagrams to be labelled
- Timelines with pictures, dates, and descriptions of events
- Scientific classification puzzles
- Vocabulary lists
In short, you can create whatever inspires you and engages your students.
Psychology: Distinguishing Behaviours, Thoughts and Feelings
The H5P option is much more complex and cerebral than Flippity. It is ideal for presenting more challenging written material and consolidating vocabulary through “cloze” questions. It is even useful for introducing new content.
For instance, I like the idea of an “either-or” introductory quiz, in which students have to do a fair bit of guessing and receive feedback on each answer — followed by a quick vocabulary check, as in this example:
The Life of Peasants
You can see all my quizzes at this link (and clone them if you wish in order to speed up your own quiz-making).
3) Playbuzz https://www.playbuzz.com
The Playbuzz site allows you to create an interactive story for your students by presenting information with pictures and text and posing questions with built-in feedback for readers.
In the process of creation, you can choose from a range of presentation screens, such as:
- A quotation screen
- Your own text
- Embedded videos
- “Trivia” screens that permit you to include questions for students to answer
- “Convo” screen through which you can present a range of different viewpoints
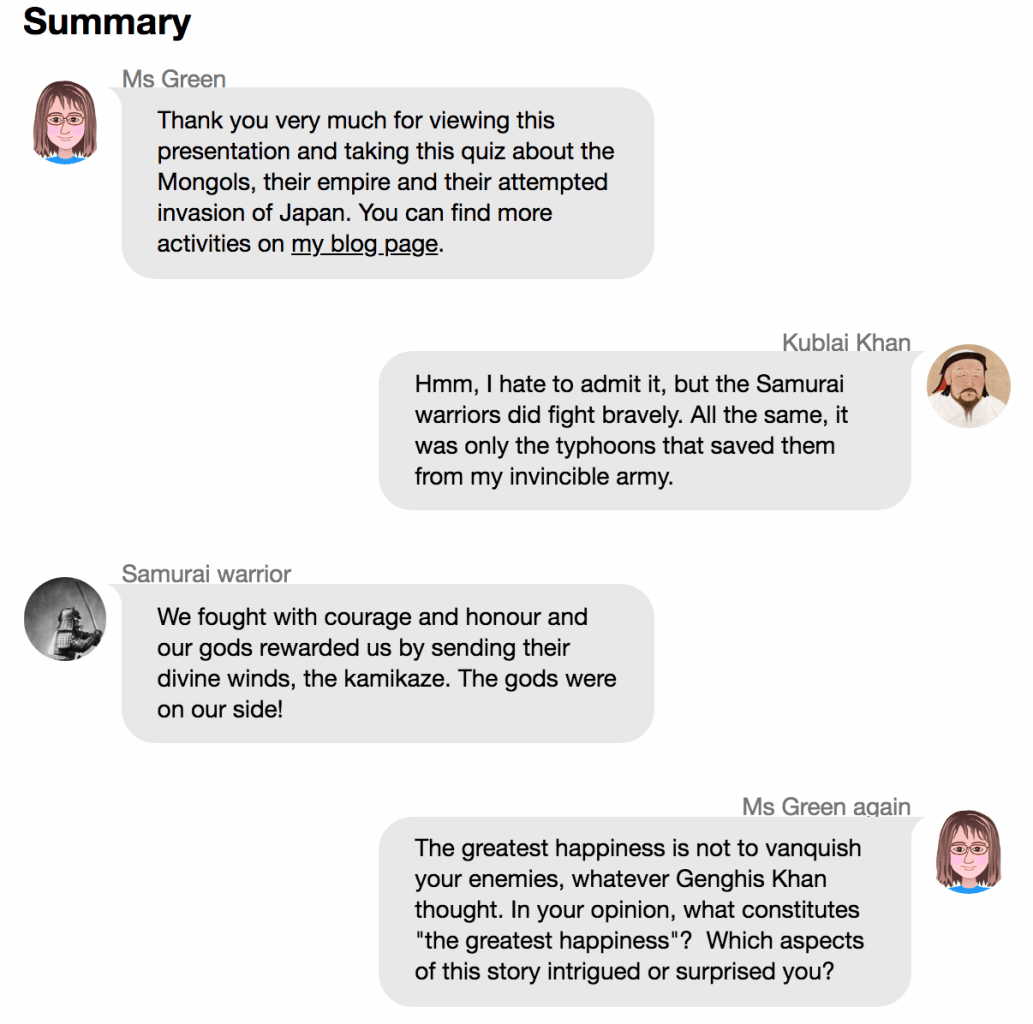
Below is a screenshot of a “convo” screen at the end of my Playbuzz story about the Mongol attacks on Japan in the 13th century.
Playbuzz could, therefore, be used not only by teachers but also by students as an alternative to a more traditional assignment format or as an idea for students’ own blogs.
It provides a multimedia story-telling program which would be engaging for students to use, although it requires time and concentration to try out and master all the options available.
I used the “convo screen” above as a springboard for students to write comments from 3-4 different perspectives. This worked well as a prompt for student blog comments on this post.
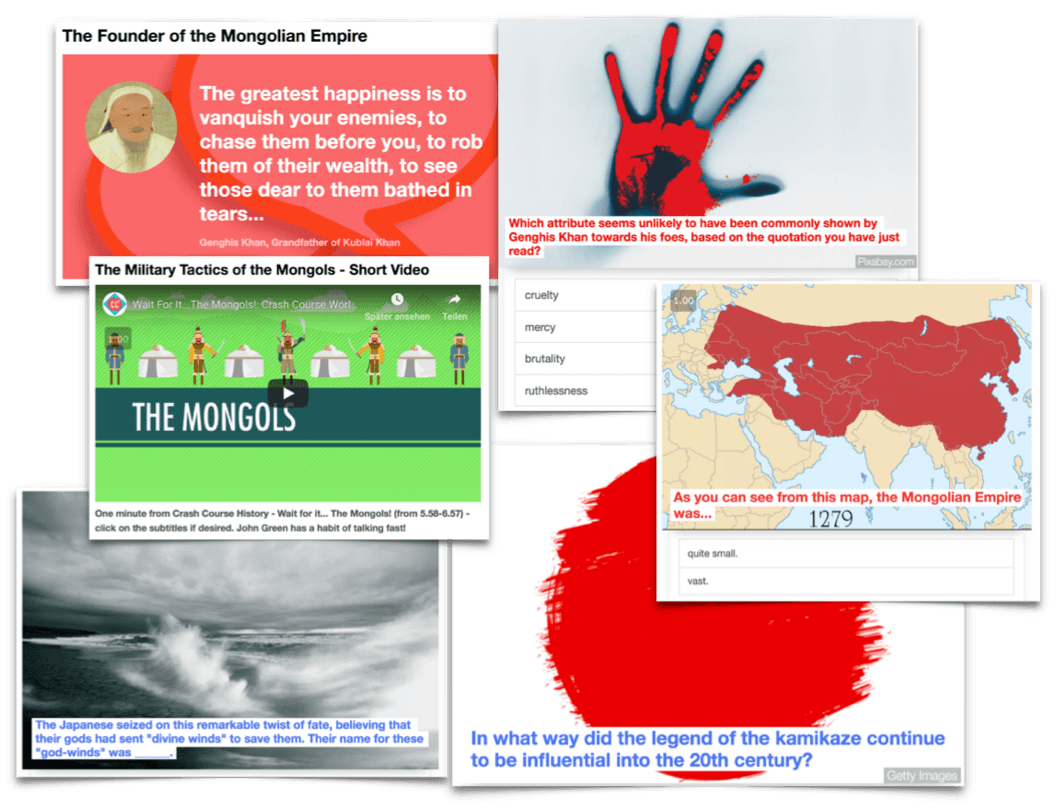
As you can see from the collage of screens from my story below, a Playbuzz story can be part text, part video, part quiz and part revision: whatever you want it to be.
Note: It is possible to embed a Playbuzz “story” into your post or page. Since its full length is displayed, however, I have avoided doing so here.
4) LearningApps https://learningapps.org
I mentioned the next three options briefly in my blogging story. Each one deserves a closer examination.
The LearningApps site is free, varied, fairly intuitive and very reliable. You will find a variety of “apps” or quiz styles there, such as crosswords, label the diagram, multiple choice, fill the gap and so forth.
This site is handy for revision of material already covered and ideal for promoting reading and comprehension of key terms. Your “apps” can be embedded in your site or provided to students via a link or a QR code.
It is important to provide HELP options so that students can click on the “lightbulb help button” if they get bogged down, especially when completing crosswords. In this way, they have a chance of figuring out the answer if it doesn’t come to mind immediately, which provides another independent learning step.
Example of a Crossword:
Students often work well together to solve a crossword and I find that this is an enjoyable way for them to focus on keywords and consolidate new vocabulary.
Here are examples of some other types of apps that can be created and embedded in your site via LearningApps:
- Label a Diagram: Structure of a Neuron (Psychology)
- Label a Picture: Mein Zimmer (German)
- Multiple Choice Quiz: Penetrating the Human Mystery (Psychology)
- Matching Grid: Anne Frank – Wortliste (German)
- Cloze Task: MLK – Ich habe einen Traum (German)
5) Wayground https://wayground.com
This site is based on multiple choice questions, like Kahoot!, but with some valuable additional options.
One option is that students can play alone or against each other. I usually get them to play alone before they play competitively and I make the competition optional.
The games can also be set up with or without a time limit. Questions may be viewed as a presentation or as flashcards before the quiz is attempted, which provides an extra step to learning and mastery for weaker students.
After the game, students can review their answers.
Finally, it is possible to print the questions, which can also benefit students who need extra thinking and reading time.
An added feature is the “memes” sets that you can either choose or create yourself. In this way, students receive encouraging and amusing feedback after each question.
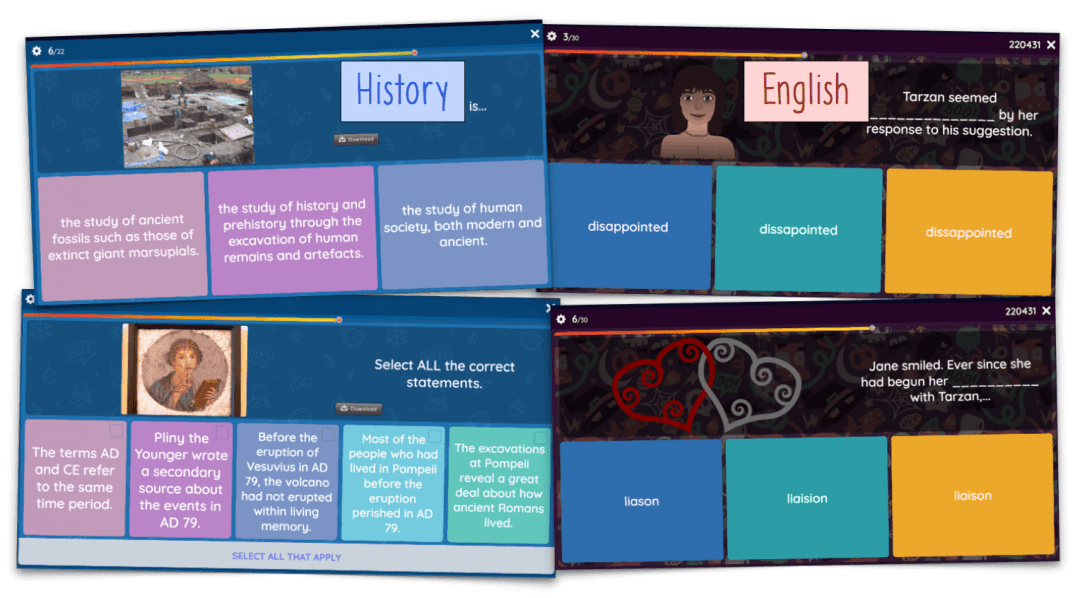
As you can see from the screenshots above and the memes below, this site is visually engaging, as well as providing an entertaining challenge for students.

My example of a Wayground for a unit on Ancient Rome: Vesuvius and Pompeii.
6) Tinycards https://tinycards.duolingo.com
This flashcard-making platform is based on the Duolingo language learning concept.
The option of adding diagrams and pictures, the sheer intuitive simplicity of the interface and the interactivity of the “lessons” that are generated are all reasons to consider using this website and placing links to your sets on your blog.
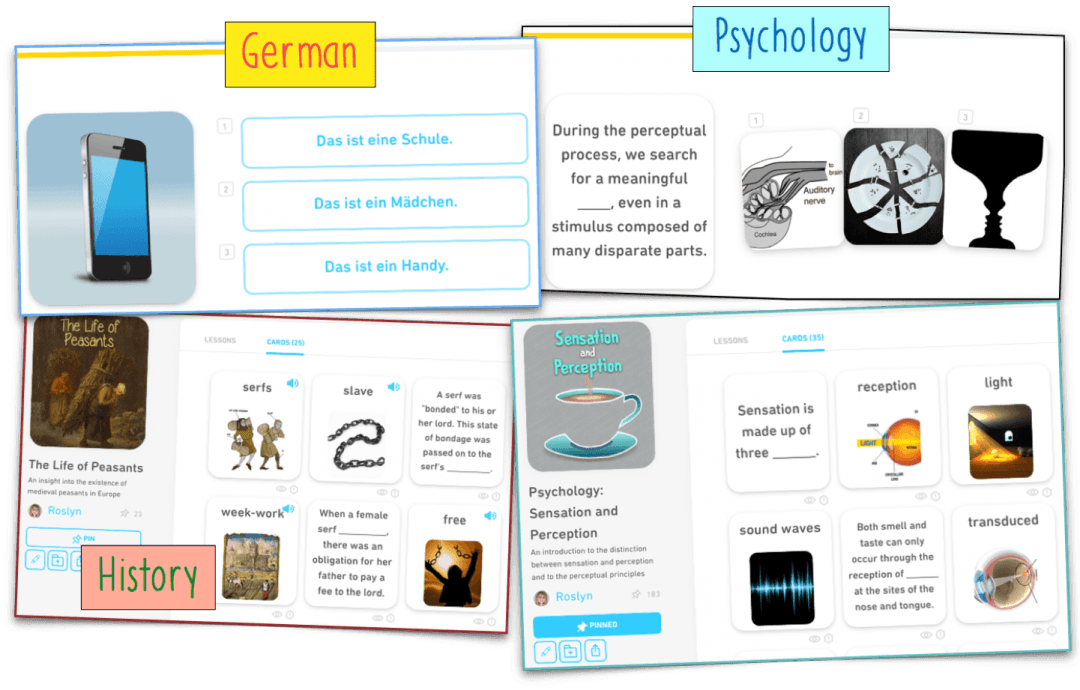
Students can also join up and create their own sets of flashcards. Consequently, Tinycards can be useful as an introductory task (you make a set for the students), as a challenge (the students create a set themselves) or as a revision strategy for older, more independent students.
I favour creating cards with a “cloze” style of task in which the student supplies a single key term (or selects it).
Conclusion
We thank Roslyn for sharing these six tools and generously providing us with her own examples.
We know that practical and free online tools are so useful for teachers who are always looking for new ways to engage students and help them learn.
The great thing about a blog is that it is simply a blank canvas and web tools can really bring it alive!


I’m trying to imbed a published Flippity activity, but cannot seem to get a live imbed. I can get the link to one, but I’d like my students to be able to play/use the activities right on my site. How do you do that? When I use the embed code provided by Flippity, all that I can see is the Google Sheet, which is not helpful. Please help!
Dear Helene,
Thanks for your interest in this post and this option. I hope this explanation will help. You need to have the flashcards actually displaying on your screen before getting the embed code. Once you are looking at a screen with your flashcards displaying on it, you will find some options for sharing at the bottom of that screen. One of them is “embed” (it’s a bit lower). Here’s what the code looks like (just an example): If your code already looks like that, yet your embedding still doesn’t work, make sure that you are pasting the code into the “text” version of your post, not the “visual” version. I could demonstrate this more easily with pictures, so write another message if neither of these suggestions works and I shall ask Kathleen if I can email you a step-by-step guide. Here is an example of what the flashcards should look like when correctly embedded: https://year7historygr.edublogs.org/ancient-history/rome-brutal-ingenious-and-systematic/ (Activity 3). I hope this helps. – Kind regards from Roslyn
5HP is not free! The cheapest deal I can see is 19 US dollars per month (when you pay 190 annually)!
Hi Heather,
Roslyn uses the free version. This is what you’d need to do to use it: first sign up for a free account.
Next, look for the option that says “Try out the H5P Authoring tool” Here’s the direct link.
Just be aware that test content created on this free service will be publicly available.
Hope that helps!
Kathleen
Thank you! That’s much better to look at than mine which is still awaiting a tidy up following a move from another supplier.
https://www.diigo.com/user/icttalk
Awesome post! Many thanks. One good deed deserves another, my gift to you: https://padlet.com/teacherdianarenke/awesome_e_resources_database
Thank you very much!
Great post. This sort of use of technology is, in my opinion, the best use for learning as the technology chosen can be used to achieve the desired objectives and outcomes rather than trying to think of lessons that will make use of a particular piece of technology.